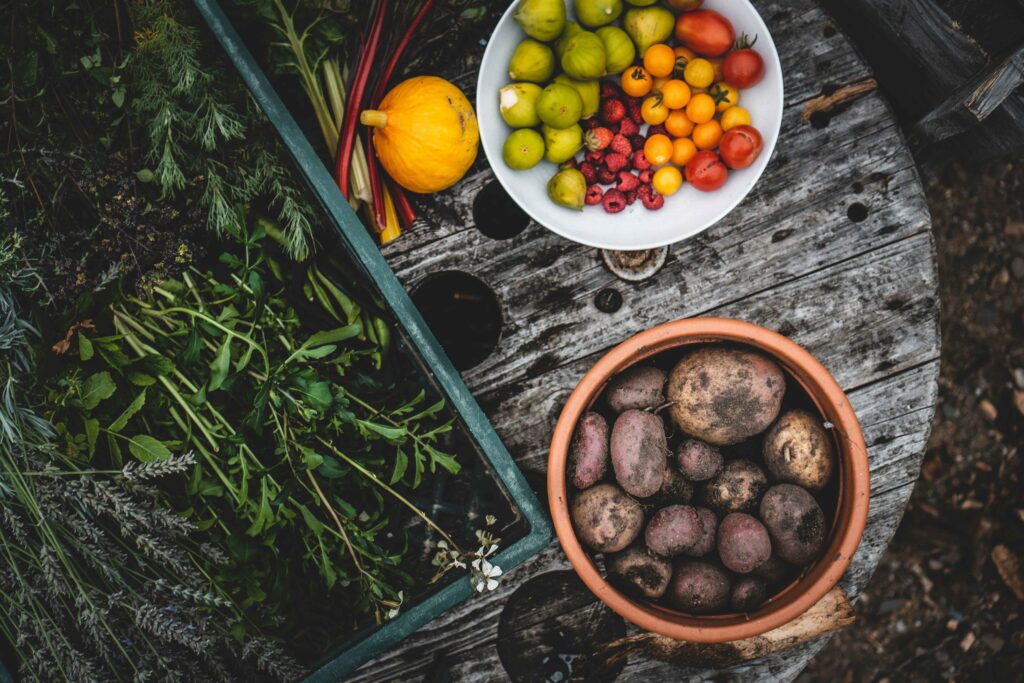
When it comes to the question on how to grow asparagus, you need to know it is one of those vegetables that separates the patient gardener from the impulsive one. It demands time, proper preparation, and a commitment to the long game. But if you’re willing to invest the effort upfront, you’ll be rewarded with a perennial crop that produces tender spears for 15 to 20 years with minimal fuss. For Australian growers looking to build a self-sufficient garden with crops that actually earn their space, asparagus is hard to beat.
This guide walks you through everything you need to know about how to grow asparagus in Australian conditions, from soil preparation and planting methods to ongoing care and harvest timing. Whether you’re planting crowns or starting from seed, the principles remain the same: get the foundation right, and the crop will look after itself.
Why Grow Asparagus?
Asparagus isn’t a quick win. You’ll wait two years before your first proper harvest, and even then, you’ll need to show restraint. But that’s precisely why it works for home gardeners who want to build resilient, low-maintenance systems that deliver year after year.
Long-term yield and low maintenance
Once established, an asparagus bed requires far less attention than annual vegetables. No replanting every season, no constant succession sowing. Just mulch, feed, water when needed, and harvest in spring. The plants are hardy, drought-tolerant once mature, and capable of producing for decades if you maintain soil fertility. For anyone serious about reducing garden workload whilst maximising output, asparagus is one of the smartest investments you can make.
Fresh flavour and nutritional value
Supermarket asparagus is often days old, shipped from interstate, and lacking the sweetness that comes from garden-to-table harvest. Fresh asparagus has a clean, slightly nutty flavour that deteriorates rapidly after cutting. Growing your own means you can pick spears in the morning and have them on the plate that evening. There’s no comparison. Nutritionally, asparagus is packed with folate, vitamins A, C, and K, and a decent hit of fibre. A crop that tastes good and does you good.
Choosing the Right Asparagus Variety
Not all asparagus varieties perform equally across Australia’s varied climate zones. Matching the right cultivar to your region improves establishment, vigour, and long-term productivity.
| Variety | Best Climate Zones | Key Characteristics |
| Mary Washington | Temperate and cool (VIC, TAS, southern NSW, SA) | Reliable, thick green spears, good disease resistance, widely available |
| UC157 | Warm and subtropical (QLD, northern NSW, WA) | Heat-tolerant, performs well in mild winters and long summers |
| Purple Passion | Temperate zones | Sweet, tender purple spears, less peeling required, turns green when cooked |
Mary Washington is the workhorse variety, widely adapted, reliable, and available almost everywhere. It performs well in temperate and cool climates, produces thick green spears, and has good disease resistance. If you’re unsure where to start, this is your default choice.
UC157 was bred in California for warmer conditions and suits Queensland, northern New South Wales, and Western Australia better than Mary Washington. More heat-tolerant, it produces well in regions where winters are mild and summers are long.
Purple Passion is a heritage variety with striking purple spears that turn green when cooked. Naturally sweeter and more tender than green varieties, it requires less peeling and grows well in temperate zones. The colour fades with heat, so if you want to keep it, eat it raw or lightly steamed.
Preparing the Soil and Bed for Asparagus
Asparagus is a heavy feeder with deep roots. Poor soil preparation is the most common reason beds underperform or fail within a few years. You need depth, drainage, and fertility. All three, not one or two.
Ideal soil conditions
The ideal soil is a deep, well-drained loam with a pH between 6.5 and 7.5. Asparagus tolerates slightly alkaline conditions better than acidity, so if your soil is below 6.0, add lime or dolomite several weeks before planting. Heavy clay soils are problematic because waterlogging during winter will rot the crowns. If you’re working with clay, build raised beds or mound the soil to improve drainage.
Bed depth and structure
Bed depth matters. Asparagus crowns need to sit 15 to 20cm below the surface, and roots will extend another 30cm or more as the plants mature. Shallow beds limit root development and reduce long-term vigour. Aim for a bed depth of at least 40cm if possible. If you’re starting with compacted or poor soil, dig deep and incorporate plenty of compost at least a 10cm layer worked through the top 30cm. Well-rotted manure, compost, or aged mushroom compost all work. Avoid fresh manure, which can burn young roots.
Preparing trenches for crowns
When it comes to asparagus bed preparation, trenching is the traditional method and still the most reliable. Dig trenches 30cm wide and 20cm deep, spacing them 1.2 to 1.5 metres apart if you’re planting multiple rows. Mound compost or aged manure in the base of the trench. This creates a nutrient-rich zone for the crowns to establish into. The trench method also makes it easier to gradually backfill soil as the spears emerge, which strengthens the developing plants.
How to Plant Asparagus Crowns
Growing asparagus from crowns is the fastest and most common method for home gardeners. Crowns are one-year-old roots sold dormant during late winter and early spring. This is when you’ll find them in nurseries and online.
Best time to plant asparagus by region
| Region | Planting Time | Reason |
| Southern states (VIC, TAS, SA, southern NSW) | Late winter to early spring (August-September) | Soil warming, optimal establishment before summer |
| Warmer climates (QLD, northern NSW, WA) | Late autumn to early winter (April-June) | Establishes before summer heat arrives |
Avoid planting in the heat of summer or the depths of winter. Crowns need moderate soil temperatures to strike roots without stress.
Step 1: Prepare and inspect crowns
Soak the crowns in water for an hour before planting to rehydrate them. Inspect each crown carefully. It should have a central bud surrounded by fleshy, firm roots. Discard any that are mushy, mouldy, or dried out.
Step 2: Create the planting mound
Spread a 5cm layer of compost or aged manure in the base of your prepared trench. This forms the nutrient-rich mound that crowns will sit on.
Step 3: Position crowns correctly
Place crowns on top of the compost mound, spacing them 30 to 40cm apart within the row. The bud should face upwards, with roots draped down and outwards over the compost mound. This positioning encourages roots to spread into the surrounding soil rather than coiling underneath.
Step 4: Initial soil covering
Cover the crowns with 5 to 8cm of soil initially, not the full trench depth. As spears emerge and grow over the following weeks, gradually backfill more soil until the trench is level with the surrounding bed. This staged covering encourages strong, upright growth and prevents spears from bending or breaking through thick soil layers.
Step 5: Water and establish
Water the bed thoroughly after planting, then keep the soil consistently moist (but not waterlogged) for the first few weeks whilst roots establish. Once growth is visible, reduce watering frequency but don’t let the bed dry out completely during the first season.
How to Grow Asparagus from Seed
Starting asparagus from seed is slower but more economical if you’re planting a large bed or want access to varieties not available as crowns. It adds an extra year to the timeline. Seeds take three years to reach full harvest compared to two for crowns, but the process is straightforward.
Sow seeds indoors in early spring (August to September in cooler regions, earlier in the subtropics). Use seed-raising mix in pots or trays, planting seeds 1cm deep and keeping them consistently moist. Germination takes two to three weeks at 20 to 25°C. Seedlings are slow-growing in the first few months, so don’t expect rapid results.
Transplant seedlings into the garden once they’re 20 to 25cm tall and have developed a small root system, usually around late spring or early summer. Harden them off first by gradually exposing them to outdoor conditions over a week or two. Plant seedlings using the same trench method as crowns, spacing them 30 to 40cm apart. Treat them gently. Young asparagus roots are brittle and easily damaged.
In the first year, seedlings will produce thin, fern-like foliage but no harvestable spears. Let them grow undisturbed to build crown and root mass. By year two, you might see a few thicker spears, but resist the urge to harvest heavily. Full production begins in year three.
Watering, Feeding, and Ongoing Care for Your Asparagus
Asparagus is drought-tolerant once established, but consistent moisture during the growing season improves spear quality and yield. In spring, when spears are actively growing, water deeply once or twice a week if rainfall is scarce. Avoid overhead watering, which can promote fungal diseases. Drip irrigation or soaker hoses are ideal.
Mulching requirements
Mulching is non-negotiable. A 5 to 10cm layer of organic mulch keeps soil temperatures stable, suppresses weeds, and retains moisture. Good mulch options include:
- Straw or lucerne hay
- Aged wood chips
- Pea straw
- Sugar cane mulch
Asparagus beds are notorious for becoming weed jungles if left unmulched, and hand-weeding between established crowns is tedious. Apply mulch after the final harvest in late spring and top up as needed throughout the year.
Feeding schedule
Asparagus soil requirements include good fertility, and that means feeding at least twice a year. Apply a balanced organic fertiliser or well-rotted compost in early spring before spears emerge, then again in late summer or early autumn after the ferns have developed. Avoid high-nitrogen fertilisers during the harvest period. They push leafy growth at the expense of spear production. A top-dressing of compost and a handful of blood and bone per square metre is usually sufficient.
Asparagus Pests and Diseases
Asparagus is relatively pest-resistant, but a few common problems can reduce yield or damage plants if left unchecked.
Asparagus beetle
This is the main pest concern. Adult beetles are small, orange and black, and both adults and larvae feed on spears and ferns. Heavy infestations can defoliate plants, weakening crowns and reducing the following year’s harvest.
Hand-pick beetles and larvae when numbers are low. For larger infestations, spray with organic pyrethrum or neem oil, targeting both foliage and stems. Removing old fern growth in winter also helps, as beetles overwinter in plant debris.
Aphids
Aphids occasionally cluster on young spears and fern tips, sucking sap and spreading viral diseases. A strong blast of water usually dislodges them. If populations build up, spray with insecticidal soap or neem oil.
Asparagus rust
Asparagus rust is a fungal disease that appears as orange pustules on ferns and stems, typically in humid or poorly ventilated beds. It doesn’t kill plants but weakens them over time. Improve air circulation by spacing plants properly and removing infected foliage. Copper-based fungicides can control rust if applied early, but prevention through good cultural practices is more effective.
Crop rotation doesn’t apply to asparagus because it’s a permanent planting. But avoid planting asparagus where onions, garlic, or potatoes have recently grown, as these can harbour soil-borne diseases that affect asparagus roots.
Asparagus Harvesting and Maintenance
This is where patience pays off. After planting crowns, resist harvesting in the first year. Let all spears grow into ferns to build crown strength. In year two, you can take a light harvest, cut spears for two to three weeks only, then let the rest grow. From year three onwards, harvest freely for eight to ten weeks each spring.
Harvest timing by year
| Year After Planting | Harvest Duration | Approach |
| Year 1 | No harvest | Let all spears grow into ferns |
| Year 2 | 2-3 weeks | Light harvest only, then allow ferns to develop |
| Year 3+ | 8-10 weeks | Full harvest season |
Cutting technique
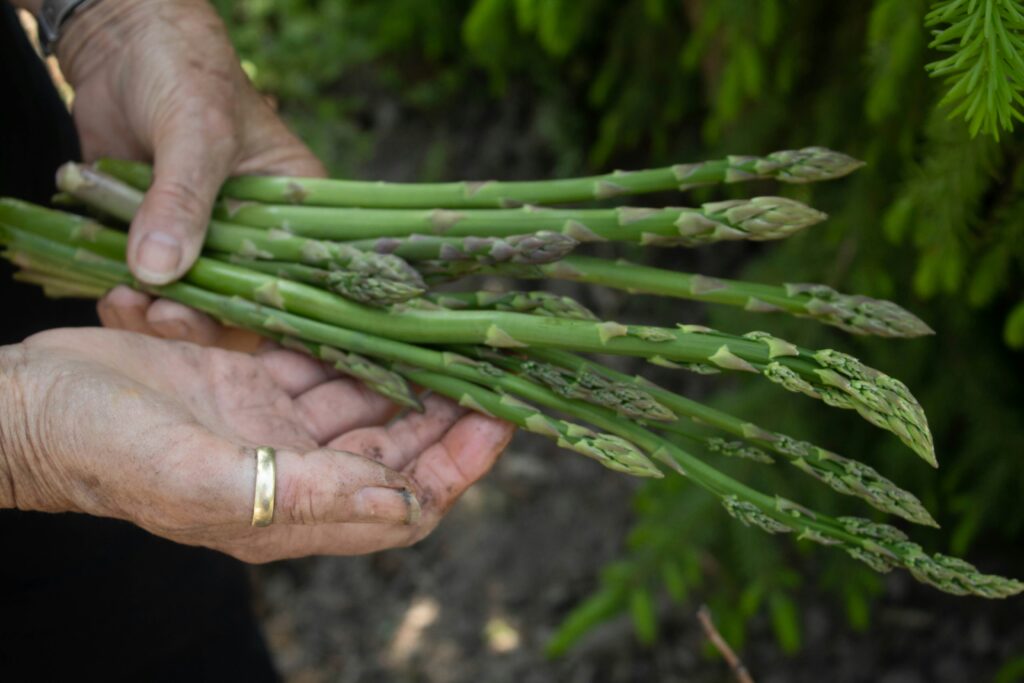
Cut spears when they’re 15 to 20cm tall and still tightly closed at the tip. Use a sharp knife to slice cleanly at soil level or just below. Don’t snap or twist spears, as this can damage emerging buds underground. Harvest every one to two days during peak production. Spears grow fast in warm weather and can go from perfect to woody in 24 hours.
End of season care
Stop harvesting once spear diameter drops noticeably or when ferns start appearing in earnest. This signals the crowns are depleting their stored energy. Let all remaining spears develop into ferns. These will photosynthesise and recharge the crowns for next year’s crop.
At the end of the growing season, allow ferns to yellow and die back naturally. This usually happens in late autumn or early winter. Cut dead foliage down to ground level and remove it from the bed to reduce pest and disease carryover. Apply a fresh layer of compost and mulch, then leave the bed alone until spring.
Extending Asparagus Bed Life and Propagation
A well-maintained asparagus bed can produce for 15 to 20 years, but productivity will eventually decline as crowns age and become overcrowded. You can extend bed life by dividing old crowns every 10 to 12 years.
Dig up mature crowns in late winter whilst they’re dormant. Divide them by hand or with a spade, ensuring each division has several buds and a healthy root system. Replant divisions immediately, either in the same bed (after refreshing the soil with compost) or in a new location. This process rejuvenates the planting and gives you extra crowns to expand your bed or share with other growers.
Maintaining soil fertility is the other key to long-term success. Asparagus depletes nutrients over time, so annual applications of compost, aged manure, and organic fertilisers are essential. If yields drop despite good care, consider a soil test to check nutrient levels and pH. Sometimes a simple adjustment restores vigour.
Summary: How to Grow Asparagus as a Long-Term Crop
Asparagus isn’t for gardeners chasing instant results. It’s for those who understand that the best crops are the ones that keep producing long after the initial work is done. Get the soil right, plant properly, and resist the urge to overharvest in the early years. In return, you’ll have fresh spears every spring for the next two decades. No replanting, no fussing, just cut and eat.
The principles are simple: deep, fertile, well-drained soil; crowns planted in trenches and gradually backfilled; consistent moisture and mulching; light feeding twice a year; and disciplined harvesting that allows crowns to recharge. Follow those rules, and asparagus care and harvest becomes one of the easiest routines in the garden.
For Australian growers serious about building a productive, low-maintenance food system, asparagus is one of the smartest investments you can make. A crop that rewards patience and punishes shortcuts, and that’s exactly the kind of plant worth growing.
Frequently Asked Questions on How to grow asparagus
The best time to plant asparagus crowns is in late winter to early spring when the soil starts to warm. In warmer states like Queensland, late autumn can also work.
Asparagus takes about two years from planting crowns to reach full harvest. In the first year, allow the plants to establish and avoid heavy picking.
Yes. Start seeds indoors in early spring, then transplant seedlings once they’re around 20cm tall. Crowns are faster but seeds are more economical.
Keep beds mulched, water regularly, and fertilise at the start and end of the growing season. Cut back the ferns after they die off in winter.
A well-maintained asparagus bed can keep producing for 15 to 20 years, making it one of the most rewarding long-term crops for self-sufficient gardens.