
In Australia’s variable climate, making the most of every raindrop isn’t just environmentally responsible—it’s increasingly essential. Whether you’re looking to reduce water bills, maintain your garden during restrictions, or become more self-sufficient, rainwater harvesting offers a practical solution that any Australian homeowner or small-scale farmer can implement.
Why Harvest Rainwater in Australia?
A typical Australian home with a 200-square-meter roof can collect approximately 160,000 liters of water annually in regions receiving 800mm of rainfall. Even in drier regions with 400mm annual rainfall, that same roof can harvest about 80,000 liters—enough to significantly reduce reliance on mains water.
Beyond water savings, rainwater harvesting systems provide:
- Water security during restrictions and drought periods
- Chemical-free water ideal for gardens and food production
- Reduced stormwater runoff and associated environmental impacts
- Potential savings on water bills
Choosing Your Rainwater Harvesting Approach
Your rainwater harvesting journey should match your needs, space, and budget. Here are three practical approaches to consider:
The Basic Garden System
Perfect for beginners and those primarily interested in garden irrigation, a basic system requires minimal investment while providing significant benefits, especially during water restrictions (plus, most of the materials you’ll need can be found at your local Bunnings!).
To implement this system:
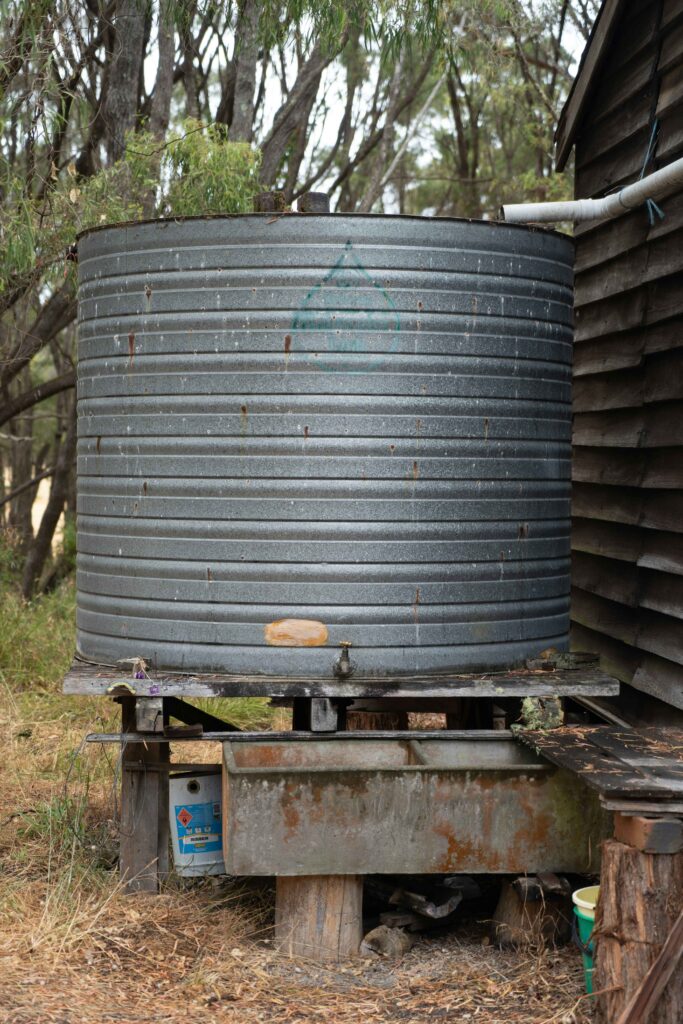
First, select a stable, flat location near a downpipe that can support the weight of your tank when full (a 1,000-liter tank weighs over one ton). Choose a tank between 1,000-2,000 liters as an ideal starting point.
Install gutter guards along your roof line to prevent leaves and debris from clogging the system. Connect your chosen downpipe to the tank using a rainwater diverter kit, which typically includes all necessary fittings and is designed for DIY installation.
Add a tap at a comfortable height for filling watering cans or connecting a hose. Consider installing a first-flush diverter to discard the initial rainfall that washes your roof clean of dust and debris, significantly improving water quality.
Maintenance is straightforward: clean your gutters quarterly, check diverters twice yearly for blockages, and inspect tank inlets occasionally to ensure free water flow. This system typically costs between $800-1,500 and can be installed in a weekend.
The Household Connection System
Ready to expand beyond garden use? A household connection system directs rainwater to toilets and laundry—two significant water users that don’t require drinking-quality water.
Implementation begins with consulting your local council about relevant regulations. Choose larger tanks (5,000-10,000 liters) and position them to capture water from multiple downpipes if possible. Install first-flush diverters on each connected downpipe to improve water quality.
The heart of this system is the pump setup. Choose a pump with automatic pressure control that activates when taps open and deactivates when closed. Install it on a concrete pad near your tank, connect it to your tank’s outlet, and run plumbing to your toilet and laundry connections. Most states require a licensed plumber to make these final connections.
An automatic mains water backup system ensures continuous water supply during dry periods by seamlessly switching to mains water when tank levels are low.
This system requires quarterly filter cleaning, annual checks of all components, and pump maintenance every 2-3 years. The investment ranges from $3,000-7,000 depending on complexity and professional installation requirements, but can reduce mains water consumption by 40-50%.
The Small Farm System
For small-scale farmers and those seeking maximum water self-sufficiency, a comprehensive system designed for high water needs integrates larger storage capacity, advanced filtration, and distribution networks tailored to agricultural requirements.
Begin by calculating your water requirements based on crops, livestock, and household needs. Design tank placement to maximize collection from all available roof surfaces, including sheds and outbuildings. Install professional-grade filtration that can handle larger volumes and various contaminants.
Create a distribution network with designated irrigation zones that can be controlled independently based on plant water requirements. Connect your pump system with a pressure tank to maintain consistent water pressure without constant pump operation.
For properties with limited space, underground tanks protect water quality and preserve valuable surface area. While more expensive initially, underground systems provide superior water quality by maintaining cooler temperatures and preventing algae growth.
This investment ranges from $10,000-25,000+ depending on scale, but delivers returns through agricultural productivity, reduced water costs, and drought resilience.
Installing Your First Rainwater Tank: A Step-by-Step Guide
Ready to implement a basic rainwater harvesting system? Follow these practical steps:
1. Assess Your Property
Walk around your property to identify potential tank locations near downpipes with stable ground and minimal direct sunlight. Measure the available space, accounting for access requirements for maintenance.
Calculate your roof catchment area (approximately equal to your house footprint). For example, a house with 15m × 10m dimensions has roughly 150 square meters of catchment area. In an area receiving 600mm annual rainfall, this roof could potentially collect 90,000 liters annually.
Check with your local council regarding permits or restrictions that might apply to rainwater tank installations in your area.
2. Choose the Right Tank
Polyethylene (plastic) tanks offer affordability and versatility, with various colors to match your home. They’re lightweight and easy to position but have a shorter lifespan than alternatives.
Steel tanks provide durability and fire resistance—important in bushfire-prone areas. They typically offer larger capacity options but may cost more initially.
For properties with limited space, slimline designs fit well alongside walls or fences.
When determining size, consider:
- Garden use only: 1,000-3,000 liters
- Garden plus laundry: 3,000-5,000 liters
- Whole-household non-potable: 5,000-10,000 liters
Consider installing multiple smaller tanks rather than one large tank. This approach provides redundancy, easier installation without heavy machinery, and allows for incremental expansion.
3. Prepare Your Collection System
Clean gutters thoroughly, removing all debris and checking for proper drainage. Install quality gutter guards that prevent leaves while allowing water to flow freely.
Verify that your gutters have adequate fall toward downpipes (approximately 1cm drop per meter length). Check that downpipes can handle water flow during heavy rain; standard 90mm downpipes are typically sufficient for most Australian homes.
If trees overhang your roof, consider trimming branches that drop excessive leaves or provide access for animals.
4. Install Key Components
A first-flush diverter is essential for water quality. Cut into your chosen downpipe approximately 1-1.5 meters above ground level and connect the diverter according to manufacturer instructions. Ensure the discharge pipe directs discarded water away from your house foundations.
Add a leaf catcher or rain head at the top of your downpipe or at the tank inlet. Position it for easy access, as regular cleaning ensures optimal performance.
For household connections, consider an in-line filter between the tank and pump to remove finer particles for laundry and toilet use.
5. Set Up Your Tank
Place your tank on a level, stable base—a concrete slab is ideal, but compacted sand can suffice for smaller tanks. Allow minimum 10cm clearance between your tank and any walls.
Connect your tank to the prepared downpipe using appropriate fittings. Ensure all connections are watertight by checking for leaks during the first rainfall. Install an overflow pipe directed away from buildings to manage excess water during heavy rainfall.
Connect your chosen outlet—a simple tap for basic systems or a pump connection for more advanced setups. Position the outlet at least 10cm from the tank bottom to prevent sediment from entering your water supply.
6. Create Your Distribution System
For garden use, install a tank tap at a convenient height (typically 30-40cm from the ground) for watering can filling or hose connection. If your tank position doesn’t provide adequate pressure for irrigation, add a small pump designed for rainwater applications.
For household connections, install a submersible or external pump with pressure control. External pumps are easier to maintain but require protection from weather. Connect the pump to designated plumbing points using appropriate pipe materials—typically copper or polyethylene for underground sections.
Add a mains water backup with appropriate backflow prevention devices for continuous supply during dry periods. Install shut-off valves at key points to facilitate maintenance without draining the entire system.
Test your completed system by running connected appliances and checking for proper pressure and flow.
Advanced Techniques for Maximum Efficiency
Once your basic system is operating, consider these techniques to improve efficiency:
Passive Irrigation Integration
Create a rain garden to productively use tank overflow or first-flush water. Identify a natural low point in your garden, excavate a shallow depression (15-20cm deep), add a gravel layer for drainage, and cover with good quality topsoil mixed with compost. Plant with water-tolerant native species and direct your tank overflow to this area.
For larger properties, implement swales—shallow, gently sloping channels that run across your property contours. These distribute overflow water across your property, reducing erosion and increasing groundwater recharge.
Smart Technology Integration
Tank level monitors provide real-time information about water availability, helping manage usage during dry periods. Smart controllers automatically switch between rainwater and mains based on tank levels and water needs. More sophisticated systems incorporate soil moisture sensors that optimize garden water use.
These technologies connect to home WiFi networks and provide alerts for low tank levels or system issues. While adding some cost, they significantly improve water efficiency and reduce management effort.
Filtration Upgrades
For expanded water use, add a sediment filter after your pump to remove finer particles. Select an appropriate micron rating (typically 5-20 microns for household applications) and install with shut-off valves for easy cartridge replacement.
For higher water quality, add carbon filtration after the sediment filter to improve clarity, odor, and taste. For the highest needs, UV treatment provides effective disinfection without chemicals.
Maintaining Your Rainwater Harvesting System
A simple maintenance routine keeps your system operating efficiently:
Monthly
Check and clear gutter guards and tank inlets, especially during fall when leaf drop increases.
Quarterly
Clean all filters according to manufacturer instructions. Check pump operation by running connected appliances and listening for unusual noises.
Annually
Inspect the entire system including tank structural integrity. Clean inside the tank if accessible. If using water for household purposes, consider testing water quality.
Seasonally
Before the wet season, complete comprehensive cleaning of gutters, downpipes, and filters. During dry seasons, monitor usage carefully and implement conservation measures. After storms, check for damage and clear debris immediately.
Troubleshooting Common Issues
Water Quality Problems
Discolored or smelly water usually indicates organic matter in the tank or algae growth. Clean gutters thoroughly, check first-flush systems, and consider tank cleaning if problems persist.
Mosquitoes in your tank suggest gaps in screening or damaged seals. Check all inlets and outlets for proper mosquito-proof mesh and repair damaged seals immediately.
Flow Problems
Low pressure typically results from pump issues or clogged filters. Clean all filters, check pump operation, and inspect pipes for restrictions.
If your tank isn’t filling during rain, look for blocked gutters or misdirected downpipes. Clear blockages, check connections, and verify water is reaching the tank inlet.
System Failures
For leaking tanks, locate the source by inspecting thoroughly when full. Small cracks in plastic tanks can often be repaired with appropriate sealants. For metal tanks, specific repair kits are available.
Pump cycling (rapidly turning on and off) indicates pressure switch issues or small system leaks. Check pressure settings, inspect for leaks in pipes or taps, and verify pressure tank operation if included.

Expanding Your Rain Collection System
As your needs grow, consider these expansion approaches:
Connect Multiple Tanks
Install tanks at the same height using balance pipes (minimum 40mm diameter) at the tank bases. Add valves for individual tank isolation during maintenance. This approach allows incremental expansion as budget permits.
Add Collection Points
Connect additional downpipes from previously untapped roof areas, including sheds and garages. Ensure these surfaces use appropriate materials and install separate first-flush systems for each new collection area.
Upgrade Distribution
Add drip irrigation for garden efficiency. Connect rainwater to additional household points as your confidence grows. Where possible, use gravity-fed distribution by positioning tanks at elevated points to create natural pressure.
Real-World Success Stories
Urban Townhouse Solution
Sarah’s Melbourne townhouse featured a 2,000-liter slimline tank along her fence line, connected to the rear downpipe. The system maintained her herb garden and vegetable patch through water restrictions, with a total investment of $1,800.
Suburban Family Home
The Wilson family in Brisbane installed two 5,000-liter tanks connected to both toilets and laundry. Their system featured smart controllers and efficient filtration, resulting in a 45% reduction in water bills and a garden that thrived through dry periods. Their $6,500 investment provided substantial returns through water savings.
Small-Scale Farm
The Coopers’ 3-acre Victorian vegetable farm implemented 50,000 liters of storage collected from multiple roof areas. With UV treatment and zoned irrigation, they achieved 80% water self-sufficiency for crop production. By staging implementation over three years, they managed the $15,000 investment within their farm budget.
Your Four-Week Rainwater Collection Implementation Plan
Week 1: Plan
Measure your roof area, identify tank locations, note downpipe positions, and check council regulations. Research local suppliers and tank options to match your needs and budget.
Week 2: Purchase and Prepare
Visit suppliers, purchase your tank and components. Prepare your site by leveling the selected location. Clean gutters thoroughly and install guards to prevent debris.
Week 3: Install Basics
Position your tank, connect to your chosen downpipe, install first-flush diverters, and set up overflow management. Connect your primary distribution method and test all connections.
Week 4: Optimise
Add additional filtration if needed, install mosquito-proof mesh on all openings, and create a simple maintenance schedule. For garden applications, connect efficient irrigation systems.
Conclusion
Implementing rainwater harvesting offers immediate and long-term benefits for Australian homeowners and small-scale farmers. Start with a system matched to your immediate needs and budget, knowing you can expand incrementally as your experience grows.
Even modest systems make a difference—a single tank connected to a garden tap reduces pressure on mains water and provides resilience during restrictions. By harvesting rainwater effectively, you’re securing your own water supply while contributing to broader water conservation efforts.
Your journey toward water self-sufficiency begins with that first tank. The techniques outlined here provide practical approaches suitable for various property types, budgets, and technical abilities—all leading to a more sustainable water future.
Note: While this guide provides practical information about rainwater harvesting systems, specific implementation should consider local conditions, regulations, and professional advice where appropriate.

