
Building a homemade smoker on your rural property is one of the most rewarding steps towards self-sufficiency. Whether you’ve recently moved from the city to a lifestyle block or you’re expanding your small-farm capabilities, a DIY smoker lets you preserve meat, fish and cheese using methods that have sustained families for generations. In this guide, you’ll learn how to design and construct a safe, efficient backyard smokehouse suited to Australian conditions. We’ll cover materials selection, firebox design, the differences between cold smoking and hot smoking, and practical tips for integrating a smokehouse into your rural property lifestyle.
Why Build A DIY Smokehouse?
A homemade smoker offers several advantages over commercial units. You control the size, design and materials to suit your specific needs and budget. You can process your own livestock, fish from local waters, or produce from neighbouring farms without relying on commercial processors. This saves money over time and gives you complete oversight of food quality and safety.
Building a DIY smoker also adds value to your property. It becomes a functional asset for your self-sufficient lifestyle, allowing you to smoke fish, prepare tender pulled pork, age sausages and create distinctive smoked cheeses. The flexibility to adapt your smokehouse for both cold and hot smoking means you can tackle a wide range of preservation projects throughout the year.
However, challenges exist. Fire safety is paramount, especially in bushfire-prone areas. Council regulations may apply, even on rural blocks. Food safety requires careful attention to temperatures and techniques, particularly with cold smoking. Australian weather (intense summer heat, high humidity in coastal zones, and termite activity) requires thoughtful material choices. Addressing these issues upfront ensures your smokehouse operates safely and lasts for decades.
Australian Considerations Before You Start
Permits, Bush-fire Attack Level (BAL) & Local Council Rules
Before you begin construction, check with your local council about building permits and regulations. In many rural shires, small outbuildings under a certain size may not require a permit, but rules vary. If your property lies in a Bushfire Attack Level (BAL) zone, additional fire-resistant construction standards may apply. This could influence your choice of materials and smokehouse location.
Contact your council’s planning department or visit their website. Ask specifically about structures that generate heat and smoke. Some councils treat smokehouses like outdoor ovens or barbeque shelters, which may have specific setback requirements from boundaries, dwellings and vegetation.
Climate and Materials Choice
Australia’s climate varies dramatically. In the tropical north and humid coastal areas, moisture and termites pose serious risks to timber structures. Inland properties face extreme heat and dry conditions that can crack untreated wood and stress metal components. Choose materials that suit your local climate.
Never use treated pine or other chemically treated timber in a smokehouse. Chemicals can leach into food when heated. Opt for naturally durable Australian hardwoods like ironbark, jarrah or red gum for framing. These resist termites and weather well without treatment. Alternatively, build with bricks or cinder blocks for a low-maintenance, fire-resistant structure.
For roofing, corrugated iron or steel sheeting works well and is readily available. In high-humidity areas, ensure adequate ventilation to prevent mould growth inside the chamber. If you live in a termite-prone region, consider a concrete slab foundation and metal or masonry walls.
Location, Ventilation and Fuel Source
Site your smokehouse carefully. Choose a spot with good natural airflow but sheltered from strong prevailing winds that could disrupt smoke flow or create fire hazards. Position it away from your house, sheds and other structures; at least five to ten metres is sensible for safety and to avoid smoke nuisance.
Consider access to your fuel source. Hardwood offcuts, seasoned logs or charcoal need storage nearby. Ensure easy access for loading meat and tending the fire. Avoid low-lying areas where moisture accumulates. A gentle slope aids drainage and prevents water pooling around the base.
Ventilation is critical. Your smokehouse needs air intake at the base and an outlet at the top to create draft. This draws smoke through the chamber and expels it safely. Poor ventilation leads to stale, acrid smoke that ruins food and creates dangerous creosote buildup.
Planning Your Homemade Smoker Design
Choose Cold Smoking, Hot Smoking or Both
Understanding the difference between cold smoking and hot smoking helps you design the right smokehouse for your needs. For beginners, hot smoking is significantly safer and more forgiving.
Hot smoking
Occurs between 52 °C and 80 °C. It cooks and smokes food simultaneously, killing pathogens whilst adding flavour. Hot-smoked products like fish, chicken, ribs, pulled pork and brisket are safe to eat immediately after cooking. Hot smoking typically takes several hours and is the recommended starting point for home smokers. The cooking process provides a margin of safety that cold smoking lacks.
Cold smoking
Operates at temperatures between 20 °C and 30 °C. This method adds smoke flavour without cooking the food. Cold smoking is traditionally used for bacon, ham, salmon and cheese.
Critical food safety warning: Cold smoking carries significant health risks if done incorrectly. The low temperatures don’t kill harmful bacteria like listeria, salmonella or botulism spores. Meat must be properly cured with curing salts (sodium nitrite) before cold smoking. Even with proper curing, cold smoking presents risks that hot smoking doesn’t. Professional operations occasionally experience recalls due to contamination. Many food safety experts advise against cold smoking meat at home unless you have comprehensive training in curing and preservation. If you’re new to smoking, stick with hot smoking until you’ve thoroughly researched cold smoking food safety protocols.
Cold smoking does work safely for some products. Hard cheeses can be cold-smoked with minimal risk if kept below 20 °C to prevent melting. Salt, spices and nuts are also safe candidates for cold smoking.
Many small-farm smokehouses are designed primarily for hot smoking, with the option to add cold smoking capability later once you’ve mastered the basics. You achieve this by building a separate firebox that can be positioned close to the chamber for hot smoking or connected via a longer flue for cold smoking once you’re ready to tackle those techniques safely.
For Australian conditions, hot smoking works year-round in most regions with proper temperature monitoring. Cold smoking is best attempted in winter when ambient temperatures stay low, but should only be undertaken with proper food safety knowledge.
Size and Capacity Considerations
Think about how much food you’ll smoke at once. A small household with a few pigs, chickens and fishing trips needs less capacity than a hobby farm supplying a farmgate stall or local markets.
A modest backyard smokehouse might measure 1.2 m wide by 1.2 m deep by 2 m tall. This provides enough space for hanging several sides of bacon, multiple racks of fish or a dozen sausages. Larger operations may build chambers 2 m by 2 m or bigger.
Consider vertical space. Hanging meat requires height, typically 1.5–2 m inside the chamber. Racks for fish or cheese need at least 300–400 mm of clearance between levels. Plan interior layout before finalising dimensions.
Don’t overbuild. A smaller, well-designed DIY smoker is easier to manage, heats more evenly and uses less fuel than an oversized structure. You can always expand later.
Materials for a Homemade DIY Smoker
Select materials that are food-safe, durable and appropriate for your climate.
Timber framing: Use untreated Australian hardwood. Ironbark, jarrah and red gum are excellent choices. Avoid softwoods and never use treated pine. Hardwood resists termites and handles heat without warping.
Walls: Options include:
- Weatherboards made from hardwood or fibre cement (non-combustible)
- Brick or cinder block (fire-resistant, long-lasting, excellent for hot smoking)
- Sheet metal (lightweight, but insulate if using in hot climates to prevent excessive heat buildup)
Roof: Corrugated iron or steel sheeting is standard. Ensure the roof slopes to shed rain and has adequate overhang to protect walls. Install a chimney or flue outlet through the roof with proper flashing to prevent leaks.
Door: Build a tight-fitting door from timber or metal. It should seal well to retain smoke but allow you to adjust airflow slightly if needed. Heavy-duty hinges and a latch are essential. Consider adding a small viewing window with heat-resistant glass.
Interior fittings: Use stainless steel racks, hooks and rods. Stainless steel resists corrosion and won’t taint food. Avoid galvanised steel inside the chamber, as zinc fumes can be hazardous when heated. Mild steel is acceptable but will rust over time.
Insulation: For hot smoking, insulation isn’t always necessary in mild climates. In colder regions or if you want better temperature control, line walls with non-combustible insulation like ceramic fibre or rock wool. Never use fibreglass insulation near heat sources.
Step-by-Step Homemade Smoker Build Guide
Step 1 – Prepare the Foundation and Firebox
Start with a solid, level foundation. Clear the site of grass and debris. Lay a base of compacted gravel or install concrete pavers. This prevents moisture from wicking into timber and provides a non-combustible surface.
For a hot smoker (recommended for beginners), you can integrate the firebox directly beneath or beside the smoking chamber. Build a fire pit lined with bricks or use a cast-iron firebox. Ensure it sits on a concrete or brick base with air vents underneath for draft control. The chamber sits above or alongside with a steel plate or grate separating the fire from the food.
If you later decide to add cold smoking capability, construct a separate firebox at least 2–3 m from the smoking chamber. The firebox can be a simple metal drum, brick enclosure or small masonry structure. Connect it to the chamber with a buried flue pipe or an above-ground insulated pipe. This distance allows smoke to cool before entering the chamber. Cold smoking setups are more complex and should only be attempted after mastering hot smoking.
Draft is essential. Install an adjustable air intake at the base of the firebox. This controls oxygen flow, which regulates fire intensity and smoke production. A simple sliding metal plate or adjustable vent works well.
Step 2 – Construct the Smoking Chamber
Frame the chamber using your chosen timber or build masonry walls. For a timber-framed structure, use posts at each corner set into concrete footings or bolted to a concrete slab. Attach horizontal rails to support wall cladding.
Clad the exterior with weatherboards, fibre-cement sheets or corrugated iron. Ensure joins are tight and weatherproof. If using timber cladding, install it vertically or at a slight angle to shed water.
Build the interior with smooth, easy-to-clean surfaces. Hardwood boards or sheet metal work well. Avoid rough surfaces that trap grease and soot.
Install the door frame and hang the door. Ensure it fits snugly but opens easily. Add weather stripping if necessary, but remember you need some air exchange during smoking.
If building with bricks or blocks, lay courses with fire-resistant mortar. Ensure the structure is plumb and level. Leave openings for the door, chimney and any vents.
Step 3 – Install Ventilation and Flue / Chimney
Proper ventilation creates the draft that pulls smoke through the chamber. At the base of the chamber, install one or more air intake vents. These can be simple holes with sliding metal covers for adjustment. Position them near the firebox or smoke inlet.
At the top of the chamber, install a chimney or flue outlet. A metal flue pipe 100–150 mm in diameter works well. Extend it at least 300–500 mm above the roofline to ensure smoke disperses safely. Cap the chimney with a rain cover or damper that allows smoke out but keeps rain and pests from entering.
If building a cold smoking setup later, connect a separate firebox to the chamber with a flue pipe buried underground or running along the ground. Slope the pipe slightly upward towards the chamber to encourage smoke flow. Insulate above-ground pipes to retain heat if needed.
Adjust dampers or vents during operation to control draft. Strong draft speeds smoking but can dry food. Weak draft leads to stale smoke and poor flavour. Experiment during test runs to find the right balance.
Step 4 – Fit Racks, Hooks and Interior Access
Inside the chamber, install stainless steel rods or hooks for hanging meat. Space them 300–400 mm apart vertically. Use sturdy fixings that can support the weight of large cuts. Hooks should be removable for cleaning.
For racks, use stainless steel mesh or expanded metal. Build frames that slide in and out on rails or rest on ledges. This allows you to load and unload food easily. Space racks at least 150–200 mm apart for airflow.
Consider a mix of hooks and racks for versatility. Hang sausages and larger cuts; use racks for fish fillets and cheese.
Ensure you can access all interior surfaces for cleaning. Install a small shelf or ledge near the door for thermometers or drip pans.
Step 5 – Fuel Source and Smoke Generation
Choose your fuel carefully. Hardwood produces the best smoke flavour for hot smoking. Australian hardwoods like ironbark, red gum and jarrah are excellent choices. Fruit woods like apple and cherry, though less common here, add mild, sweet smoke if you can source them. Avoid softwoods like pine, which produce resinous, acrid smoke.
Note on eucalyptus: Many Australian hardwoods come from eucalyptus species. Opinions vary on their use for smoking. Some people enjoy the distinctive flavour, whilst others find it too strong or bitter. If using eucalyptus-based woods like ironbark or red gum, use well-seasoned wood and start with small amounts to see if you enjoy the flavour. These woods work better for shorter hot smoking sessions rather than extended cold smoking.
Use seasoned wood with moisture content below 20%. Green wood smoulders poorly and creates excessive soot. Split logs season faster than whole ones. For cold smoking (if you pursue it with proper training), use wood chips or sawdust that smoulder without flames.
Charcoal is another option. Lump hardwood charcoal provides consistent heat with minimal smoke. Add wood chunks for flavour. Avoid briquettes with additives.
To generate smoke, build a small fire in the firebox and add wood chunks once coals form. Control smoke density by adjusting fuel amount and airflow.
Never use treated timber, plywood, chipboard or painted wood as fuel. These release toxic chemicals when burned.
Step 6 – Test, Calibrate and Smoke for First Time
Before smoking food, run several test fires. This burns off construction residues and lets you calibrate temperature and draft controls. Light a fire and monitor chamber temperature with multiple oven thermometers placed at different levels. Accurate temperature monitoring is critical for food safety.
For hot smoking, aim for 52–80 °C throughout the chamber. Check multiple locations to identify hot and cold spots. Note how long it takes to reach temperature, how much fuel you use, and how smoke flows through the chamber.
Check for leaks or hot spots. Smoke should flow evenly without escaping through gaps. Uneven temperature indicates poor insulation or draft problems.
Once satisfied, run a test batch with inexpensive cuts. Smoke some chicken thighs or fish fillets. Use a meat thermometer to verify internal temperatures reach safe levels: 74 °C for poultry, 63 °C for fish, 71 °C for pork. This confirms your setup works and gives you confidence before tackling expensive or time-consuming projects.
Always keep a fire extinguisher or water source nearby during operation. Never leave a fire unattended.
Homemade Smoker Safety, Maintenance and Practical Tips
Fire safety is paramount, especially on rural properties in bushfire-prone areas. Keep the area around your smokehouse clear of dry grass, leaves and flammable materials. Install the smokehouse away from bush and tree overhangs. In high-risk BAL zones, use non-combustible materials and keep a 20 m clearance from vegetation if possible.
Never operate your smokehouse on days of total fire ban or extreme fire danger. Have firefighting equipment on hand like a hose, extinguisher or fire blanket.
Regular maintenance extends your smokehouse’s life and ensures food safety. After each use, clean the interior while it’s still warm. Scrape down racks and hooks. Remove ash from the firebox. Wipe walls to prevent creosote buildup. Creosote is a sticky, flammable residue from incomplete combustion. It accumulates over time and poses a fire hazard.
Annually, inspect the structure for rust, rot, termite damage or cracks. Reapply protective finishes to timber exteriors. Check the roof for leaks and the chimney for blockages. Replace worn door seals.
For food safety with hot smoking, use reliable meat thermometers to verify safe internal temperatures. Keep detailed logs of time, temperature and batches. This helps you troubleshoot issues and maintain consistent results.
If you eventually pursue cold smoking after thorough research and training, understand that meat must be properly cured with sodium nitrite before smoking. Cold smoking alone doesn’t kill pathogens. Consult reputable sources on curing techniques and food safety. Monitor temperatures meticulously throughout the process. Consider taking a food safety course before attempting cold smoking of meat.
Avoid cross-contamination by dedicating equipment to raw or cooked products. Clean thoroughly between uses. Don’t smoke fish and cheese in rapid succession without deep cleaning, as flavours and bacteria transfer.
What You Can Smoke in Your Homemade Smoker
A well-built DIY smoker opens up a world of possibilities for hot smoking. Here are products suited to Australian conditions:
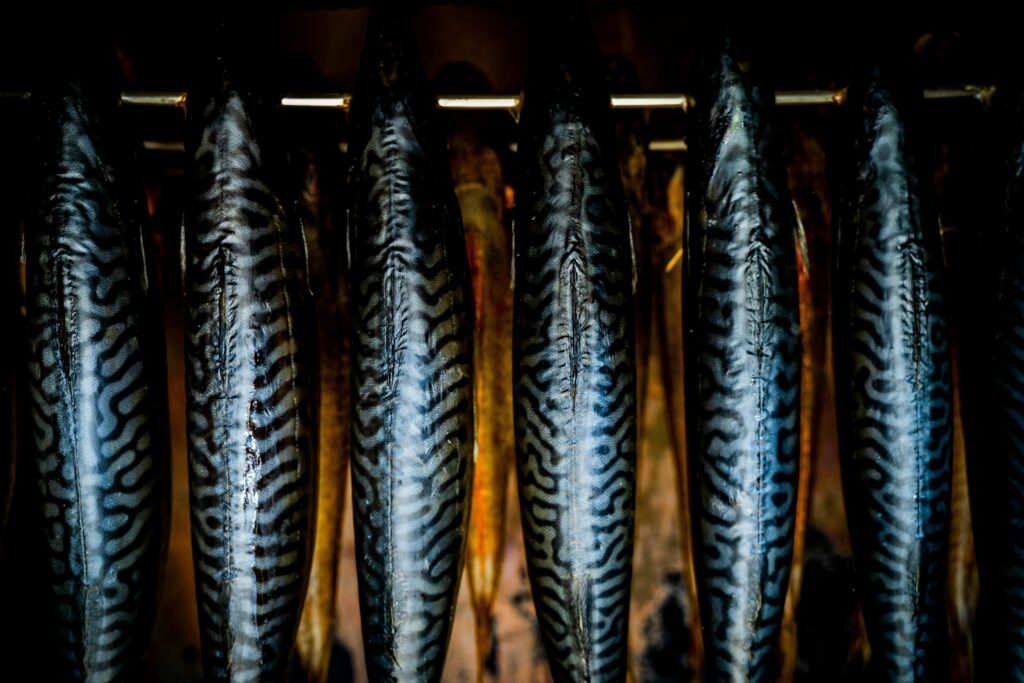
Fish: Hot-smoke barramundi, trout, salmon or mackerel for ready-to-eat fillets. Fish typically needs 1–3 hours at 60–80 °C depending on thickness.
Poultry: Hot-smoke whole chickens, ducks or quail for tender, flavourful meat. Always verify internal temperature reaches 74 °C.
Pork: Hot-smoke ribs, pulled pork shoulder, pork chops or sausages. Pork should reach 71 °C internal temperature.
Beef: Hot-smoke brisket, ribs or roasts for rich, smoky flavour. Beef can be served at lower temperatures but verify food safety guidelines.
Lamb: Hot-smoke leg of lamb, shoulder or chops for distinctive flavour suited to Australian palates.
Cheese: Warm-smoke hard cheeses like cheddar at 20–30 °C for subtle smoky flavour. Monitor closely to prevent melting.
Vegetables: Hot-smoke capsicums, tomatoes, eggplant or corn for versatile ingredients.
Experiment with local produce. Smoke kangaroo, emu, goat or wild-caught seafood. Start with shorter smoking times and adjust based on results.
Advanced cold smoking projects like bacon, ham and cold-smoked salmon should only be attempted after mastering hot smoking and thoroughly researching proper curing and food safety protocols. These require weeks of preparation, precise temperature control, and comprehensive understanding of food safety risks.
DIY Smoker Cost Breakdown and Scale for Small Farms
Building a small backyard smokehouse costs between $500 and $2,000, depending on materials and size. Here’s a rough breakdown:
- Timber framing (hardwood posts, rails): $200–$400
- Wall cladding (weatherboards, bricks or sheet metal): $150–$500
- Roofing (corrugated iron, flashing): $100–$200
- Door, hinges, latch: $50–$100
- Chimney pipe, fittings: $50–$100
- Stainless steel racks, hooks, rods: $100–$300
- Firebox materials (bricks, metal, grate): $50–$150
- Concrete, gravel, footings: $50–$150
- Thermometers (multiple required), dampers, hardware: $50–$150
Labour is free if you build it yourself. Expect one to three weekends of work for a basic structure. Masonry builds take longer but require less ongoing maintenance.
Fuel costs are minimal if you source offcuts or fallen timber from your property or neighbours. A season’s worth of smoking might use $50–$100 in purchased wood or charcoal.
Compare this to commercial smokers, which range from $1,500 for small units to $5,000-plus for professional models. A homemade smoker tailored to your needs offers better value and greater flexibility.
For small farms, a smokehouse integrates into broader self-sufficiency goals. It processes your livestock, preserves bulk purchases, and creates distinctive smoked products. The return on investment comes not just from cost savings but from enhanced food security and quality of life.
Homemade Smoker Troubleshooting Common Problems
Even well-built smokehouses occasionally present challenges. Here’s how to address common issues:
Too much soot on food:
This indicates incomplete combustion. Use dry, seasoned wood. Increase airflow to the firebox. Avoid overloading the chamber, which restricts air circulation. Clean the chimney regularly to prevent blockages.
Uneven temperature:
Check for leaks where smoke escapes. Seal gaps around the door and walls. Insulate the chamber if temperatures fluctuate wildly. Rearrange racks to ensure even airflow. Rotate food halfway through smoking. Use multiple thermometers to identify hot and cold spots.
Damp wood won’t burn:
Store firewood under cover in a dry, ventilated area. Split logs season faster than whole ones. Check moisture content with a meter; below 20% is ideal. In humid climates, stack wood in a shed or under a tarp raised off the ground.
Poor draft or smoke blows back:
Ensure the chimney is tall enough and not blocked. Check that air intake vents are open. Wind direction can affect draft so a good idea would be to install a chimney cap or wind deflector. On calm days, draft may be weak; a small fan near the intake can help.
Creosote buildup:
Use dry wood and maintain proper combustion temperatures. Don’t let the fire smoulder excessively. Clean interior surfaces regularly. If creosote hardens, scrape it off with a metal scraper and burn a hot fire to reduce buildup.
Termites or rot:
Inspect annually. Replace damaged timber immediately. Use naturally durable hardwoods or masonry construction in termite-prone areas. Keep the base dry and well-drained.
Excessive smoke flavour or bitterness:
Use less wood or reduce smoking time. Ensure smoke is thin and blue, not thick and white. White smoke indicates incomplete combustion and tastes acrid. This is particularly important if using eucalyptus-based hardwoods, which can become bitter with excessive smoke. Allow food to rest after smoking – flavours mellow over time so this is the best way to get a lovely smoked flavour.
Food not reaching safe temperature:
Check thermometer calibration. Increase fire size or improve insulation. Ensure adequate draft. Never rely on appearance alone and always verify internal temperature with a meat thermometer.
Final Thoughts – Integrating a Homemade Smoker Into Your Self-Sufficient Lifestyle
A homemade smoker is a tool that connects you to traditional food preservation methods and enhances your rural property’s productivity. Whether you’re hot-smoking fresh fish, preparing tender pulled pork, or smoking a batch of sausages from your own livestock, a backyard smokehouse brings satisfaction and skill to your self-sufficient lifestyle.
Take the time to plan carefully, build safely, and learn through practice. Start with hot smoking and simple projects, then expand your repertoire as you gain confidence. Master temperature control and food safety before considering advanced techniques like cold smoking. Your smokehouse will become a valued asset, providing delicious food for your family.As you continue developing your small-farm skills, explore related preservation methods. Learn how modern meat preservation techniques like freezing and vacuum sealing complement smoking for year-round food security. Try your hand at making beef jerky and biltong, which use similar equipment and techniques. And if you’re still in the planning stages of your rural transition, check out our checklist for moving from the city to a rural property in Australia to ensure your new lifestyle block meets all your self-sufficiency goals.

