
Grafting fruit trees joins two plants so they grow as one, creating fruit trees stronger, more productive, and better adapted to local conditions than trees grown from seed. This ancient technique lets home growers preserve favourite varieties, create multi-variety trees producing different fruits from a single trunk, and achieve fruiting years faster than seedling trees.
The right timing and technique make the difference between successful grafts producing vigorous growth and failed attempts wasting scion wood and rootstock. This guide covers what beginners need to know: when to graft different fruit types in Australian climates, which techniques work best for common situations, and how to care for grafts until they establish.
Important: This guide provides general educational information about fruit tree grafting. Success depends on factors including scion and rootstock quality, weather conditions, technique execution, and aftercare. Practice on spare rootstocks before grafting valuable trees. This is not professional horticultural advice.
What Is Fruit Tree Grafting and Why Do It?
Grafting involves joining tissues from two different plants so they function as a single plant. The bottom portion, called rootstock, provides the root system and determines final tree size. The top portion, called scion, determines what fruit the tree produces. When properly executed, these two parts fuse at the graft union, creating a complete tree combining the best characteristics of both.
Why Graft Rather Than Grow from Seed?
Fruit produced from trees grown from seed is typically sour, and the first fruiting may take years to occur. This happens because most fruit trees don’t “come true” from seed – apple seeds produce apples, but not the same variety as the parent tree. A Granny Smith seed might grow into a tree producing small, bitter fruit nothing like its parent.
Grafted fruit trees produce consistent fruit that may even be disease or pest-resistant. The fruit you eat is more likely from a grafted tree rather than a tree grown from seed. Commercial orchards and nurseries use grafting universally to guarantee fruit quality and tree characteristics.
Benefits for Home Growers and Small Farms
Preserve varieties: Grafting creates exact genetic copies of superior individual trees. That exceptional apple tree in your grandmother’s yard can live on through grafted scions, producing identical fruit for generations.
Control tree size: Different rootstocks control how tall grafted trees grow. Dwarfing rootstocks keep trees small enough for easy harvest and small gardens. Standard rootstocks produce full-sized trees suitable for large properties.
Faster fruiting: Grafted trees often bear fruit 2-4 years after planting, whilst seedling trees may take 7-10 years or longer. Time saved matters significantly for growers wanting harvests sooner.
Disease resistance: Many rootstocks resist specific diseases or tolerate challenging soil conditions. Grafting desired varieties onto resistant rootstocks combines fruit quality with plant health.
Multi-variety trees: Grafting multiple scions onto one rootstock creates trees producing different apple varieties, stone fruits, or citrus types from a single trunk. This maximises variety in limited space.
Common Fruit Trees Suited to Grafting in Australia
Almost all temperate fruit trees graft successfully including apples, pears, stone fruits (plums, peaches, apricots, cherries, nectarines), and persimmons. Citrus trees graft readily including oranges, lemons, limes, mandarins, and grapefruit. Subtropical and tropical fruits including avocados, mangoes, and lychees also respond to grafting though techniques differ slightly.
Compatibility matters critically. Trees within the same species nearly always graft successfully; any apple grafts onto any apple rootstock. Trees within the same genus often work – stone fruits (Prunus genus) including apricots, peaches, plums, and cherries graft together in many combinations. Trees from different genera rarely succeed even if from the same family.
Best Time to For Fruit Tree Grafting in Australia
Timing determines grafting success more than any other factor. Grafting when trees are dormant or just beginning active growth provides optimal conditions for scion and rootstock to fuse.
Seasonal Timing Principles
The best time to graft fruit trees is during late winter or early spring. The idea is to graft before new growth begins and after the chance of severe cold has passed. During late winter and early spring, rising temperatures cause sap to flow, creating ideal conditions for graft unions to heal and callus to form.
Spring is often considered the best time for grafting many fruit trees, particularly from late winter to early spring. Temperatures between 10°C and 27°C (50°F and 80°F) provide optimal grafting conditions. Grafting during frost or excessive rainfall can hinder success, so gardeners should choose mild and dry days.
Timing by Fruit Type
Apples and pears: Graft in late winter to early spring when buds are beginning to swell but haven’t opened. The best time to graft apple trees is usually April to early May or springtime when buds are starting to open. You can graft until full blossom hits, though earlier timing generally succeeds better.
Stone fruits (peaches, plums, apricots, cherries, nectarines): Graft stone fruits in late winter or early spring. These trees’ dormancy phase provides a healthy environment for grafting. Timing slightly earlier than pomes works well so aim for when buds show green but haven’t pushed new leaves.
Citrus trees: Graft citrus in late spring to summer when temperatures are consistently warm. Ideal citrus grafting temperature is when the forecast ranges from 21°C to 29°C (70°F to 84°F), allowing citrus wounds to heal best. Citrus grafts well into summer in warmer Australian regions.
Avocados and tropical fruits: These graft successfully during warm months when trees actively grow. Follow similar temperature guidelines as citrus; consistent warmth above 20°C promotes healing.
Regional Variations in Australia
Temperate southern regions (Victoria, Tasmania, southern NSW, South Australia):
Late August through October provides ideal timing for most deciduous fruits. Cold winters ensure deep dormancy; grafting as trees break dormancy works excellently.
Warm temperate zones (coastal NSW, southern Queensland):
Late July through September suits deciduous fruits. Winters are milder; watch for early bud movement and graft accordingly.
Subtropical regions (Brisbane, coastal Queensland):
Deciduous fruits graft well in July-August. Citrus can graft almost year-round but performs best September-January during active growth.
Tropical areas (far north Queensland, Northern Territory):
Citrus and tropical fruits graft during the dry season (May-October) when temperatures moderate slightly. Mangoes graft best during emerging flowering periods.
Collecting and Storing Scion Wood
Collect scion wood in late winter during dormancy for spring grafting. Fruit tree cuttings for apples, pears, and stone fruits should be pencil-thick and harvested in late winter. The scions must be fully dormant so if buds start opening, you’ve waited too long.
Choose one-year-old wood approximately 6-12mm diameter. Cut scions 20-40cm long from healthy, disease-free trees. Select wood from the outer, sun-exposed part of the tree – interior wood may be weak or etiolated. Identify the top (growing end) with a diagonal cut and bottom (root end) with a square cut.
Proper storage keeps scion wood viable until grafting time. Seal cut ends with melted candle wax to prevent moisture loss. Bundle scions by variety and wrap in damp newspaper. Place bundles in sealed plastic bags in the refrigerator at 1-4°C. Scion wood stores successfully for 2-6 months if kept moist and cold. Check weekly for mould (wipe clean if present) or drying (mist newspaper lightly).
Tools and Materials You’ll Need for grafting fruit trees
Quality tools and proper materials significantly improve grafting success rates and work efficiency.
Essential Tools
Sharp grafting knife: A razor-sharp blade makes clean cuts essential for good cambium contact. Grafting knives have curved blades designed for specific grafting cuts. Alternatively, craft knives like Exacto knives work adequately. Sharpen knives frequently as dull blades crush tissue rather than slicing cleanly.
Pruning shears or secateurs: Use for cutting scion wood, trimming rootstock, and removing unwanted growth. Clean, sharp pruners make precise cuts without tearing bark.
Grafting tape or parafilm: Wraps graft unions to hold pieces together whilst providing moisture retention and protection. Grafting tape stretches as plants grow and typically degrades naturally within months. Parafilm works similarly. If unavailable, thick plastic bags cut into 2-3cm strips function adequately.
Rubbing alcohol and cloth: Sterilise tools between cuts to prevent disease transmission. Wipe blades with alcohol-soaked cloth after every few cuts, particularly when moving between trees.
Labels and permanent marker: Mark every graft with variety name and date. Memory fails; labels don’t. Use weatherproof tags and waterproof markers.
Materials Needed
Rootstock: Obtain rootstock appropriate for your intended variety and desired tree size. Apple rootstocks range from very dwarfing (M27, M9) to standard vigorous (MM106, seedling). Stone fruit rootstocks include seedling (full size) or clonal varieties for specific characteristics. Contact local agricultural extension services or specialist nurseries for rootstock suited to your region.
Scion wood: Collect from known, healthy trees or participate in scion exchanges through local fruit growing groups. Many regions host annual scion swaps where growers share varieties.
Tool Sterilisation Tip
Disease spreads easily through contaminated tools. Beyond using alcohol wipes, flame-sterilise knife blades between trees by briefly passing them through a flame until metal glows slightly, then cooling before use. This kills pathogens including fire blight and stone fruit viruses. Keep tools sharp as dull tools damage tissue creating entry points for infection.
Techniques for Beginners to grafting fruit trees
Several grafting methods suit different situations. Master one technique thoroughly before attempting others.
Whip and Tongue Graft
This technique works best when scion and rootstock are similar diameter (6-12mm). It’s the most common method for beginners creating new trees.
Step 1: Make a smooth, slanting cut approximately 4-5cm long on both scion and rootstock. Cuts should be at approximately 25-30 degree angles producing maximum surface contact.
Step 2: Create a “tongue” by making a shallow, downward cut about one-third down from the top of each slanting cut. The tongue provides mechanical interlock and additional cambium contact.
Step 3: Interlock scion and rootstock by sliding tongues together. Align cambium layers (the thin green layer just beneath bark) on at least one side; cambium-to-cambium contact is essential for fusion.
Step 4: Wrap tightly with grafting tape, covering the entire union and sealing against moisture loss. Leave no gaps where air can enter.
What to watch for: Ensure cambium layers align properly. If scion is slightly smaller than rootstock, position it to one side so cambium layers match on that edge. Even partial cambium contact can succeed.
Cleft Graft
Use cleft grafting when rootstock is significantly thicker than available scion wood. This technique works well for topworking mature trees or grafting onto established rootstock.
Step 1: Cut rootstock horizontally using clean pruners or a saw. Cut should be 15-30cm above ground for new rootstock, or on scaffold branches for topworking existing trees.
Step 2: Split rootstock vertically down the centre 4-5cm deep using a sharp chisel or grafting tool. If rootstock is very thick, make a second split at 90 degrees creating a cross, allowing up to four scions.
Step 3: Prepare scion wood by cutting a long, smooth wedge on both sides of the bottom end, creating a pointed wedge approximately 4cm long.
Step 4: Insert scion wedges into splits, ensuring cambium layers align on at least one side. The outer edge of the scion should align with the outer edge of the rootstock cambium.
Step 5: Wrap firmly with grafting tape and seal all exposed wood surfaces with grafting wax or wound sealant to prevent drying.
What to watch for: Cleft grafts can dry out quickly because significant wood surface is exposed. Seal thoroughly and monitor moisture. Multiple scions increase success chances so if one takes, others can be removed.
Bud Grafting (T-Budding)
Bud grafting transplants a single bud from one tree to another. This technique works well in summer when bark slips easily from wood. It’s efficient for citrus and saves scion wood.
Step 1: Select a plump, healthy bud from the sunny side of the source tree. Choose buds with a small section of attached bark and wood.
Step 2: Make a T-shaped cut in the rootstock bark approximately 15-25cm above ground. The vertical cut should be 2-3cm long; the horizontal cut just long enough to lift bark corners.
Step 3: Cut the bud from scion wood. Start 1cm below the bud, slice upward beneath the bark taking cambium but minimal wood, and finish 1cm above the bud. The result is a shield-shaped piece with a central bud.
Step 4: Lift the T-cut bark flaps and slide the bud shield underneath. Position the bud so it points upward and sits snugly against rootstock wood.
Step 5: Wrap with grafting tape, leaving only the bud exposed. The tape holds the bud in position whilst healing occurs.
What to watch for: T-budding only works when bark slips easily – typically mid-to-late summer for deciduous fruits. If bark doesn’t separate readily from wood, timing is wrong. Successful buds stay green and plump; failed buds shrivel and brown within 2-3 weeks.
Aftercare and Common Mistakes with grafting fruit trees
Proper care after grafting determines whether unions succeed or fail.
Essential Aftercare Steps
Keep graft sites sealed:
Wrapping must remain intact for 4-8 weeks until callus forms. Check weekly and re-wrap if tape loosens or tears. Exposed graft unions dry out and fail.
Provide shade initially:
Direct hot sun can overheat and kill grafts during the first 2-3 weeks. Position newly grafted trees in partial shade or provide temporary shading with shade cloth or tree guards.
Monitor for drying:
Watch for shrivelling scion wood indicating moisture loss. Properly wrapped grafts should remain plump. If scions shrivel despite good wrapping, remove tape briefly, mist lightly, and re-wrap immediately.
Remove competing growth:
Shoots emerging from rootstock below the graft union compete with scions. Remove these promptly by rubbing off when small. Allowed to grow, rootstock shoots divert energy and can overwhelm grafts.
Watch for rot:
Excessive moisture or poor air circulation can cause fungal infection. If grafts develop grey or black mould, remove tape, clean affected areas with dilute bleach solution (1:10 bleach:water), allow to dry, and re-wrap with fresh tape.
Support if needed:
Long scions may need physical support until unions strengthen. Use soft ties or stakes avoiding pressure on graft unions.
Common Mistakes to Avoid
Don’t overwrap or underwrap:
Too much tape can restrict growth or trap excessive moisture. Too little fails to hold pieces together or seal against drying. Wrap firmly but not tightly, covering all exposed surfaces without excessive layers.
Don’t water excessively:
Newly grafted trees need moisture but not waterlogging. Overwatering promotes rot at graft unions. Water when soil is dry 5cm below surface; ensure good drainage.
Don’t force scions:
If cambium layers don’t align naturally, forcing won’t help. Recut and try again achieving better matches. Crushed or damaged cambium won’t fuse.
Don’t graft onto diseased wood:
Inspect rootstock carefully before grafting. Cankers, splits, discolouration, or visible decay indicate problems. Use only clean, healthy rootstock.
Don’t expect immediate results:
Patience is essential. Initial callus formation takes 2-3 weeks. Visible growth from buds may take 4-6 weeks or longer depending on temperature and tree type. Some grafts appear dormant for months then suddenly flush with growth.
Best Fruit Trees to Graft in Australia
Different fruits suit Australian regions based on climate requirements and grafting ease.
Apples
Apples graft easily and suit temperate regions throughout southern Australia. They require winter chill (typically 400-1200 hours below 7°C depending on variety) making them ideal for Victoria, Tasmania, southern NSW, South Australia, and elevated areas elsewhere. Grafting success rate is high. Numerous rootstock options control tree size. Scion wood availability is excellent through growing clubs and exchanges.
Pears
Similar growing requirements to apples, pears thrive in temperate zones. Grafting techniques identical to apples. Pears can sometimes graft onto quince rootstock for dwarfing, though compatibility varies by variety. European and Asian pear varieties both work well in Australian conditions.
Stone Fruits
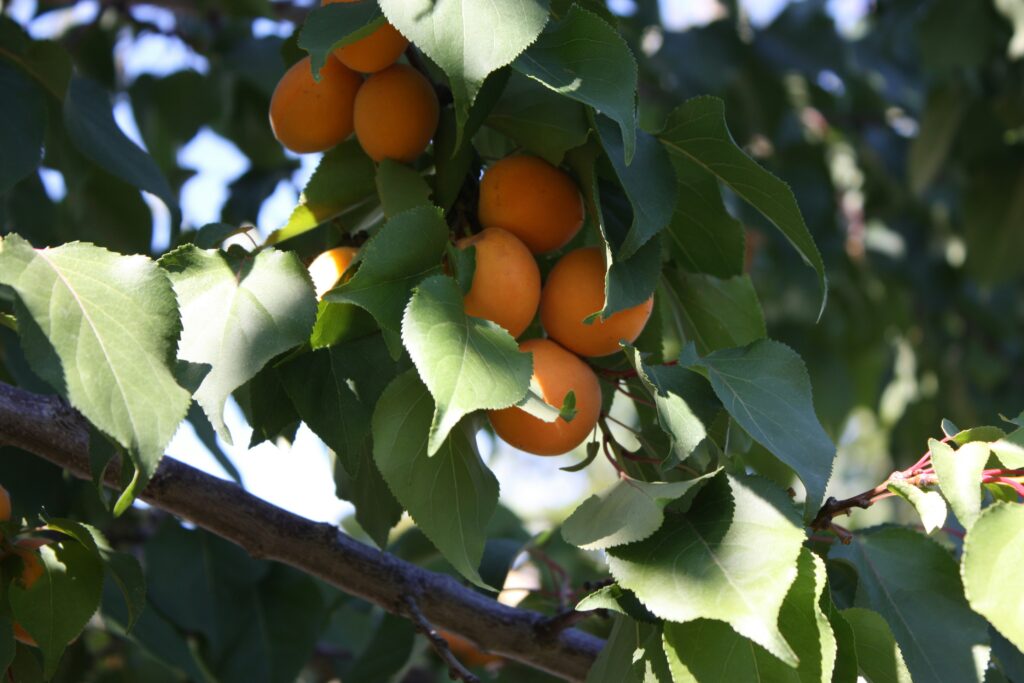
Plums, peaches, apricots, nectarines, and cherries all graft successfully. These trees share the genus Prunus, meaning many inter-graft – plum onto peach, apricot onto plum, etc. Stone fruits suit wide climate range from cool temperate to warm regions. Cherries require cooler areas with adequate winter chill. Peaches and nectarines tolerate warmer zones. Stone fruit rootstocks are often grown from seed (seedling rootstocks) because dwarfing versions remain less developed than apple rootstocks.
Citrus
All citrus types graft easily including oranges, lemons, limes, mandarins, and grapefruit. Nearly all citruses are compatible with all other citruses, allowing creative multi-variety trees. Citrus suits subtropical and warm temperate coastal regions. Frost sensitivity limits inland cold areas unless protected. Grafting extends from spring through summer during active growth. Bud grafting works particularly well for citrus.
Persimmons
Both astringent and non-astringent varieties graft successfully. Persimmons suit wide range from temperate to subtropical zones. They’re relatively easy for beginners. Rootstock availability may be more limited than common fruits but specialist nurseries supply suitable stock.
Final Tips for your first time grafting fruit trees
Approaching grafting with realistic expectations and proper preparation improves results significantly.
Practice on cheap or spare rootstock:
Don’t start with expensive or rare varieties. Purchase inexpensive rootstock specifically for practice. Make mistakes on practice stock, not irreplaceable material. Ten practice grafts teach more than reading dozens of articles.
Label every graft immediately:
Write variety name, grafting date, and technique used. Labels placed immediately prevent confusion. Unlabelled grafts become mysteries within weeks. Use weatherproof tags and permanent markers. Pencil on wooden tags works well whereas ink on plastic fades in sun.
Expect some failures:
Even experienced grafters achieve 70-80% success rates. Beginners might see 30-50% success initially. This is normal. Multiple grafts increase chances of getting desired varieties. Treat failures as learning opportunities identifying what to improve.
Join local fruit growing groups:
Scion exchanges, grafting workshops, and experienced mentors accelerate learning. Groups like local Rare Fruit Growers chapters, permaculture societies, or agricultural societies often host annual grafting events. Watching experienced grafters demonstrates techniques more effectively than written descriptions.
Start with easy combinations:
Apple onto apple rootstock represents the easiest starting point. Save challenging grafts (pear onto quince, complex stone fruit combinations, or tropical fruits) until basic techniques are mastered.
Keep tools sharp:
A sharp knife makes grafting easier, faster, and more successful. Dull knives tear tissues, crush cambium, and produce poor results. Sharpen knives before each grafting session. Learn proper sharpening techniques or have knives professionally sharpened.
Be patient for results:
First signs of growth take weeks. Scions may look dormant or even slightly shrivelled initially before buds swell and push. Resist unwrapping to check progress – leave grafts undisturbed for 4-6 weeks minimum. Successful callus formation shows as slight swelling at unions. New leaf growth confirms success definitively.
Record results:
Keep notes on what techniques work, which varieties succeed easily, timing that produces best results, and conditions during grafting. Notes improve future attempts and help identify patterns. Simple notebook entries prove invaluable after several grafting sessions.
Grafting fruit trees combines art and science, rewarding practice with productive trees producing favourite varieties for decades. Start small, learn from mistakes, and enjoy creating new trees preserving genetic heritage whilst adapting to your specific property and climate.

