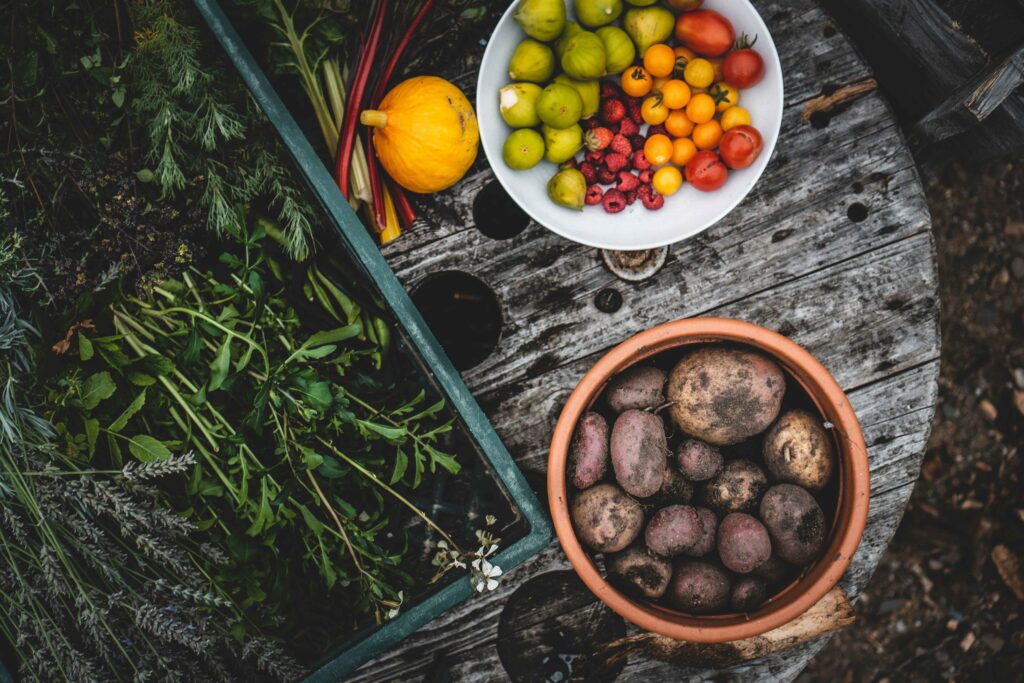
Surplus vegetables like twenty zucchini plants seemed perfectly reasonable when you planted them in spring. Now it’s January, and you’re drowning in produce faster than your household can possibly consume it. Your backyard flock delivers three dozen eggs every week, but your family only needs twelve. The house cow produces 15 litres of milk daily which is well beyond what you can drink, cook with, or gift to increasingly reluctant neighbours.
If you’ve found yourself in this predicament, you’re not alone. The abundance problem is one of the most common challenges facing people transitioning to rural or self-sufficient lifestyles. But here’s the good news: with the right strategies, that overwhelming surplus transforms from a stressful burden into genuine opportunity.
Why managing surplus is important for self sufficient operations:
- Reduces food waste and maximises your investment in seeds, animals, and time
- Creates opportunities for side income or valuable community connections
- Builds genuine food security through preservation and storage
- Teaches essential production planning skills that prevent future gluts
This guide covers practical, legal ways to manage surplus vegetables, fruit, eggs, and milk in Australian conditions. Whether you’re looking to preserve your harvest, swap with neighbours, or generate a bit of income from your land, you’ll find realistic strategies that actually work.
Understanding Surplus Cycles
When and Why Gluts Happen
Surplus doesn’t happen randomly as it follows predictable patterns that you can learn to anticipate and manage.
Vegetable and fruit gluts follow seasonal rhythms:
Most vegetables mature within tight 2-3 week windows, creating simultaneous harvests that overwhelm your kitchen. New growers consistently overplant, underestimating just how productive a single tomato plant or zucchini vine can be. Add ideal growing conditions (the perfect combination of rain and sunshine) and you’ve got bumper crops across your entire region, all maturing at exactly the same time.
The preservation timing challenge compounds the problem. Multiple crop types often reach maturity during your busiest work period, when you have the least time to process and preserve them. Before you know it, you’re giving away boxes of tomatoes to anyone who’ll take them, watching fruit rot on the tree, and feeling guilty about the waste.
Animal product surpluses have different drivers:
Egg production peaks dramatically in spring and early summer (September through January), then drops off during moulting in late summer and autumn, before slowing to a trickle through winter. Meanwhile, cows and goats produce the most milk immediately after giving birth, gradually declining through their lactation until they dry off before the next kidding or calving.
Breed selection plays a huge role too. Some chicken breeds lay 280+ eggs annually, others only 180. That difference might not seem significant when you’re choosing fluffy chicks, but it dramatically affects how much surplus you’re managing nine months later.
Common Australian Surplus Items
Vegetables that overwhelm home gardens:
- Zucchini and summer squashes: A single plant can produce 10-15kg over the season
- Tomatoes: Heritage varieties often produce 15-30kg per plant
- Silverbeet and leafy greens: Continuous producers requiring constant harvesting or they bolt
- Cucumbers and beans: Peak heavily for 3-4 weeks, then slow dramatically
Fruits creating seasonal gluts:
- Citrus: Trees produce 40-200kg in a single winter harvest window
- Stone fruits: Trees bear heavily for 4-6 weeks then finish completely
- Figs: Two crops annually, each concentrated over 2-3 weeks
- Passionfruit: Vines produce hundreds of fruit across 2-3 months
Animal products requiring active management:
- Eggs: 12-20 hens producing 10-15 dozen weekly during peak seasons
- Milk: House cow producing 10-20 litres daily, well beyond single family needs
- Meat chickens: 30 birds ready for processing simultaneously
What to Do with Surplus Vegetables and Fruit
Preservation Methods
Freezing: The Quickest, Simplest Option
Freezing preserves quality beautifully and requires minimal skill, making it ideal for beginners or when you’re short on time during peak harvest. The process is straightforward: blanch most vegetables in boiling water for 1-3 minutes, plunge immediately into ice water to stop cooking, drain thoroughly, and pack in freezer bags or containers. Label everything with contents and date, then freeze at -18°C or below.
Best for: Tomatoes, beans, peas, corn, berries, stone fruit, zucchini (grated or sliced)
Storage capacity reality:
A standard upright freezer (170L) holds approximately:
- 30-40kg of blanched vegetables
- 15-20L of tomato purée or sauce
- 20-25kg of stone fruit
Keep in mind that freezing requires reliable power, equipment investment ($500-$1,500), and dedicated space for the freezer unit. It’s not a set-and-forget preservation method – power outages and equipment failures can wipe out months of work in a single day.
Canning and Preserving: Long-Term Shelf Storage
Canning transforms fresh produce into shelf-stable foods that last 12-18 months (or longer) without refrigeration. This is preservation gold for hot Australian summers when freezer space is precious and power bills are climbing.
Best for: Tomatoes, fruit (jams, chutneys, whole fruit), pickled vegetables, sauces
Equipment needed:
- Water bath canner for high-acid foods (tomatoes, fruit, pickles): $80-$200
- Pressure canner for low-acid foods (vegetables, stocks): $200-$600
- Preserving jars with new lids each season
- Basic tools (jar lifter, funnel, labels)
Processing safety essentials:
This is critical – follow tested recipes from reliable sources like Ball, Fowlers Vacola, or university extension services. Never modify acid levels, processing times, or jar sizes in recipes. These specifications aren’t suggestions; they’re the difference between safe food and potential botulism. Always inspect seals before storage (press the centre of the lid – it shouldn’t flex), and discard any jars showing signs of spoilage like bulging lids, off odours, or mould.
Realistic production expectations:
Experienced preservers can process 12-18 jars (500ml) of tomatoes in a 3-hour session, or 6-10 jars of jam or chutney in 2 hours. This requires dedicated kitchen time during peak harvest, you can’t rush the process or cut corners. Plan accordingly.
Dehydrating: Space-Efficient Storage
Dehydrating dramatically reduces storage volume (10kg of fresh tomatoes become just 500g dried) making it ideal for small pantries and caravans. The dried products require no refrigeration, they’re lightweight, and they retain nutrients well when properly processed.
Best for: Tomatoes, zucchini, fruit leather, herbs, chillies, apples, stone fruit
Equipment options:
- Electric dehydrators ($150-$400) provide consistent results
- Solar dehydrators (DIY or purchased $200-$500) suit Australian conditions beautifully
- Oven drying is possible but less energy-efficient
Australian climate considerations:
High humidity in tropical and coastal areas makes air-drying unreliable and potentially dangerous (mould grows quickly on partially dried food). Electric or solar dehydrators are essential for consistent, safe results in these regions.
Fermenting: Nutrient-Dense Preservation
Fermentation requires minimal equipment (just jars, salt, vegetables, and time) yet preserves food for 6-12 months while enhancing nutritional value through probiotic development. It’s an ancient preservation method that’s experiencing a modern renaissance for good reason.
Best for: Cabbage (sauerkraut), cucumbers (pickles), excess vegetables (mixed ferments), tomatoes (paste), chillies (hot sauce)
Simple sauerkraut process:
Shred 1kg of cabbage finely, mix with 20g of salt (2% by weight), pack tightly into a jar, submerge completely under the brine, weight down to keep vegetables submerged, and ferment at 18-22°C for 1-4 weeks depending on your taste preference. Store in the refrigerator once you’ve achieved your desired flavour.
Australian climate fermentation challenges:
Hot summers require cool storage areas or refrigeration during fermentation. Aim for 18-22°C for best results. Brisbane and Darwin summers will definitely need air-conditioned spaces for reliable ferments – 30°C+ temperatures create unpredictable (and sometimes unpleasant) results.
Local Trade and Swap Networks
Before you invest in expensive preservation equipment or consider selling, explore community exchange opportunities. These networks build valuable relationships whilst moving surplus food to people who’ll genuinely use it.
Where to find swap opportunities:
- Local Facebook groups specifically for food swaps
- Neighbourhood sharing platforms like Olio and ShareWaste
- Community gardens with swap tables or bulletin boards
- School or workplace informal trading networks
Successful swapping strategies:
Offer surplus in consistent amounts; weekly baskets work better than sporadic deliveries. Request items you genuinely need rather than just giving everything away (sustainable exchanges work both ways). Build relationships with diverse growers for year-round exchanges, and share preservation knowledge alongside raw produce.
Example networks: Northern Rivers Food Links (NSW), CERES food swaps (VIC), Perth Urban Farm (WA), and numerous local Facebook groups operating in every capital city and major regional centre.
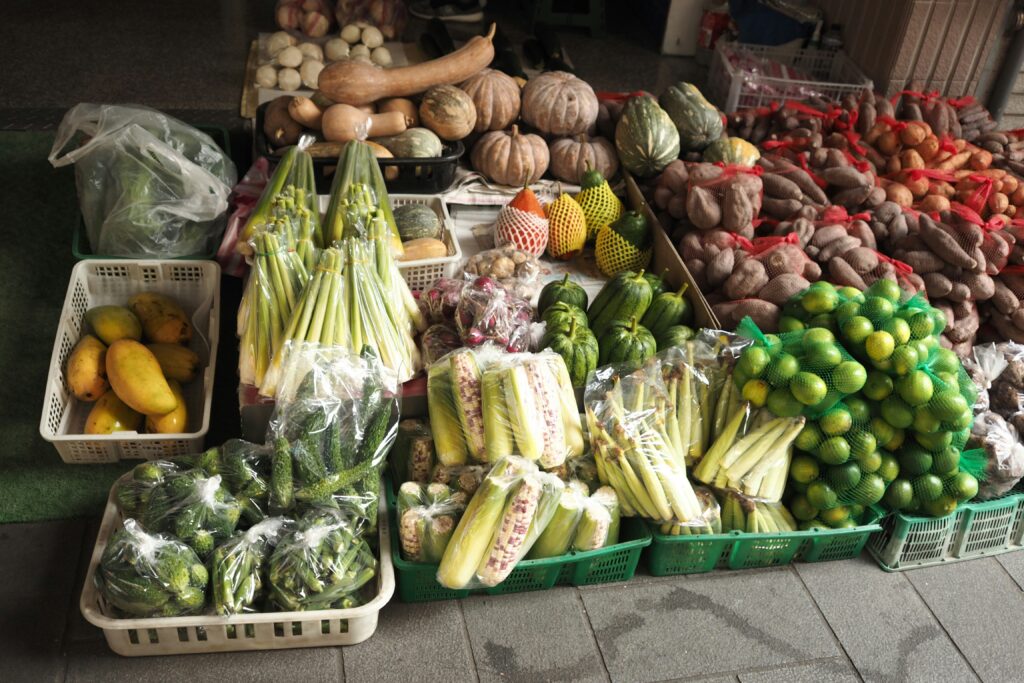
Selling Surplus Produce
Farm Gate Sales
Farm gate sales are the simplest entry point for selling surplus – no market fees, no weekly commitments, just a sign at your gate and produce available for purchase.
What’s allowed without registration:
Fresh, unprocessed fruit and vegetables sold directly from your property require no special licences in most states for basic produce sales. However, signage regulations vary by local council, so check your planning requirements before installing roadside signs.
Setting up farm gate sales:
- Check local council planning regulations for signage and traffic considerations
- Set up a weatherproof display area visible from the road
- Provide clear pricing (per kg, per bunch, per item)
- Include payment options (honesty box, cash, electronic payment)
- Ensure food safety basics (clean produce, appropriate storage)
Realistic expectations:
Location determines viability; busy rural roads perform better than remote driveways. You’ll generate seasonal income only, not year-round revenue. Financial returns vary significantly by location, season, and produce quality, but most small-scale operations generate modest income during peak season. Regular customers typically develop over 2-3 seasons of consistent quality and availability.
Farmers Markets
Markets offer direct customer contact and premium pricing, but they require significantly more commitment than farm gate sales.
Requirements vary by market and location:
- Most markets require Public Liability Insurance ($300-$600 annually)
- Stall fees typically $30-$100 per market day
- Food safety training may be required
- Regular attendance expected (you can’t participate sporadically)
Market selling considerations:
- Time commitment: 4-6 hours market day plus preparation time
- Transportation logistics for produce, tables, signage, payment systems
- Weather exposure (marquees essential, add $200-$600 to start-up costs)
- Competition from other stallholders with similar produce
Financial reality check:
Beginning stallholders’ revenue varies widely based on location, produce quality, season, and customer base. After stall fees, transportation, packaging, and time investment, net returns are typically modest. Markets work best as community connection and income supplement, not primary revenue source. Be realistic about the economics before committing, so track your actual costs and hours carefully for the first few markets to understand true profitability.
Social Media Direct Sales
Online platforms enable direct produce sales without the overhead of market stalls or shopfronts, but they come with their own challenges around logistics and customer management.
Online platforms enabling direct produce sales:
- Facebook Marketplace for local pickup
- Instagram for building following and coordinating sales
- Dedicated farm websites or apps like FoodConnect and Farmgate Direct
- WhatsApp groups for regular customer updates
Legal requirements for online sales:
- Same food safety requirements as any retail sale
- Clear pricing, pickup locations, and payment terms
- Consumer law applies (Australian Consumer Law guarantees)
- Income must be declared for tax purposes if regular and commercial
Successful online selling practices:
Post consistent availability schedules (weekly pickup days work best). Use quality photos showing actual produce condition – no Instagram filters that misrepresent what customers will receive. Be transparent about sizing, quality variations, and pricing. Establish clear policies on payment timing, no-shows, and refunds before problems arise.
Managing Surplus Eggs
Storage Methods
Refrigeration: Standard Short-Term Storage
Fresh eggs stored in cartons last 6-8 weeks when refrigerated at 4°C. Maintain constant temperature (avoid door storage where temperature fluctuates) and store pointed end down to keep the yolk centred. Don’t wash eggs until you’re ready to use them; the natural bloom protects against bacteria.
Egg freshness testing:
- Float test: Fresh eggs sink in a water bowl, older eggs stand upright or float
- Crack test: Fresh eggs have thick, firm whites that don’t spread much
- Smell test: Off eggs smell obviously bad when cracked
Freezing Eggs: Extends Storage 6-12 Months
Freezing works brilliantly for surplus eggs, though the method differs from simply cracking them into containers.
Proper freezing method:
Crack eggs into a bowl and gently mix yolks and whites together without incorporating air (you don’t want fluffy scrambled eggs at this stage). Add a pinch of salt OR 1 teaspoon of sugar per 4 eggs as this prevents the gritty texture that develops when frozen eggs thaw. Pour into ice cube trays or small containers, measuring volumes for easy recipe use later. Label clearly with quantity and whether you’ve added the sweet or savoury addition, then freeze up to 12 months at -18°C.
Uses for frozen eggs: Baking, scrambled eggs, frittatas, custards. Not suitable for fried eggs or poached eggs; the texture changes make separated eggs undesirable for these applications.
Water Glassing: Traditional Long-Term Storage
Water glassing preserves eggs 8-12 months using a traditional method that’s experiencing renewed interest amongst self-sufficiency enthusiasts.
Process and requirements:
- Unwashed eggs only (the natural bloom must be intact)
- Mix sodium silicate (water glass) with water according to product instructions
- Submerge eggs completely in the solution in a food-grade bucket
- Store in a cool location (under 20°C is ideal)
Availability in Australia:
Sodium silicate (water glass) is available through chemical supply companies, some rural supply stores, and online retailers. Expect to pay $20-$40 per litre, which treats 15-18 dozen eggs.
Important considerations: Preserved eggs develop slightly different texture – the whites become thinner. They’re best used for baking, custards, and cooked applications rather than fried or poached presentations where texture matters more.
Pickling Eggs
Pickled eggs are a classic pub food in Australia, and they’re a brilliant way to preserve surplus whilst creating ready-to-eat snacks.
Basic pickled egg process:
Hard boil eggs and peel whilst still warm. Pack into sterilised jars, cover with hot pickling solution (vinegar, spices, salt, sugar), seal, and store for 2-3 weeks before eating so flavours can develop properly. Refrigerate after opening and consume within 3-4 months.
Popular Australian variations:
- Beetroot pickled eggs (classic Australian pub food)
- Curried eggs with turmeric and curry spices
- Asian-inspired with soy, ginger, star anise
- Jalapeño and dill for a spicy kick
Safe Sale or Gifting Rules in Australia
State-Specific Egg Sale Regulations
IMPORTANT: Egg sale regulations vary by state and are updated periodically. Always verify current requirements with your state food authority before selling eggs. The information below provides general guidance as of November 2025.
New South Wales:
- Less than 240 eggs per week (under 50 laying hens) AND selling only from farm gate OR donating to fundraisers where eggs will be cooked: Exempt from stamping requirements
- Must still follow basic food safety practices
- Eggs should be clean, undamaged, and stored properly
- Verify current requirements: NSW Food Authority (www.foodauthority.nsw.gov.au)
Victoria:
- Under 50 layers producing less than 240 eggs weekly: Exempt from formal registration
- Must comply with basic food safety requirements
- Check with Agriculture Victoria for current small-scale producer requirements
- Verify current requirements: Agriculture Victoria (agriculture.vic.gov.au)
Queensland:
- Small producers should contact Biosecurity Queensland for current requirements
- Basic food safety and animal welfare standards apply
- Registration requirements depend on scale and sales method
- Verify current requirements: Biosecurity Queensland (www.daf.qld.gov.au)
South Australia:
- Producers with more than 50 laying birds must be accredited
- Smaller operations should verify current requirements with PIRSA
- Basic hygiene and storage standards apply even to small-scale sales
- Verify current requirements: PIRSA (pir.sa.gov.au)
Western Australia:
- Egg producers selling direct don’t need specific licensing for small operations
- Must comply with food safety legislation
- Verify with Department of Primary Industries and Regional Development for current rules
- Verify current requirements: DPIRD (www.dpird.wa.gov.au)
Tasmania:
- Small-scale producers supplying to colleagues, friends, and family may have exemptions
- Verify specific production limits and requirements with state authorities
- Verify current requirements: Department of Primary Industries, Parks, Water and Environment (dpipwe.tas.gov.au)
Universal Safety Requirements (All States)
Regardless of exemptions, all egg sellers should:
- Provide clean eggs (not washed, but free from heavy soiling)
- Store eggs appropriately (cool, dry conditions)
- Avoid selling cracked or damaged eggs for human consumption
- Maintain basic hygiene in collection and handling
- Be able to trace eggs back to production date and flock if issues arise
Liability considerations:
Even informal sales or gifting carries potential liability if eggs cause illness. Public liability insurance is recommended if you’re selling regularly (costs vary but typically $200-$600 annually depending on coverage level and insurer). Keep simple records of egg production and distribution, and never sell eggs you wouldn’t feed your own family.
Important note on regulation currency: Food safety regulations are updated periodically. Whilst this guide provides accurate information as of November 2025, always verify current requirements with your state food authority before commencing any egg sales, even at small scale.
Managing Surplus Milk
Important Legal Framework for Milk in Australia
Here’s the critical thing you need to understand: raw (unpasteurised) milk sales for human consumption are prohibited across all Australian states and territories. This is national food safety law under Food Standards Australia New Zealand (FSANZ) Standard 4.2.4. There’s no getting around it, regardless of what you might read in online forums or hear from other small-scale farmers.
Legal options for surplus milk:
- Process into products (butter, cheese, yoghurt) for your own consumption
- Share informally with family and friends (not commercial sale)
- Feed to other farm animals (pigs, calves, chickens can consume surplus milk)
- Sell to licensed dairy processors (requires commercial dairy registration)
What you CANNOT legally do:
- Sell raw milk directly to consumers for drinking
- Market milk as “bath milk” or “cosmetic milk” if it’s intended for human consumption
- Operate small-scale direct-to-consumer raw milk sales
Some farmers navigate regulations through complex arrangements, but these exist in legal grey areas with significant penalties for violations. Don’t risk it.
Turning Milk Into Butter, Cheese, and Yoghurt
Butter Making: The Simplest Processing Option
Butter making is wonderfully straightforward and produces a product that freezes brilliantly, solving your surplus problem whilst creating something valuable.
Basic process:
Allow fresh milk to sit for 12-24 hours so cream rises to the top (or use a cream separator if you’re processing larger volumes). Skim the cream, saving the skim milk for other uses. Churn the cream until butterfat separates from buttermilk; you can use a stand mixer, food processor, or traditional churn. Drain off the buttermilk (save it for baking or animal feed), wash the butter in cold water whilst pressing out remaining buttermilk, add salt if desired (this extends storage life), then form into blocks and refrigerate or freeze.
Yields and storage:
- 10 litres of whole milk yields approximately 3-4 litres of cream
- 3-4 litres of cream produces roughly 800g-1kg of butter
- Butter freezes excellently (6-12 months at -18°C)
- Refrigerated salted butter lasts 3-4 weeks, unsalted 1-2 weeks
Cheese Making: Requires More Skill and Equipment
Hard cheese production is genuinely complex, requiring precise temperature control, proper cultures, aging environments, and considerable practice before you produce anything resembling commercial quality.
Basic hard cheese process:
Heat milk to a specific temperature (varies by cheese type), add starter culture and rennet, cut curds when set, heat curds gently whilst stirring (the cooking stage), drain whey, press curds in moulds, then age under controlled temperature and humidity for weeks or months.
Australian home cheesemaking considerations:
Hot summers challenge aging conditions; a dedicated cheese fridge would be ideal ($300-$800) but not everyone has the space or budget. Humidity control is essential (50-90% depending on cheese style), which is difficult to maintain in standard household environments. Raw milk cheese for personal consumption is legal, but commercial sale requires special approval and extensive testing that puts it beyond reach for most small-scale producers.
Start with fresh cheeses like ricotta, mozzarella, and paneer before attempting aged varieties. These require minimal equipment and aging, building your skills without major investment.
Equipment investment:
- Basic soft cheese: $50-$100 (thermometer, moulds, cheesecloth)
- Hard aged cheese: $300-$1,000 (press, aging space, pH meters, cultures)
Yoghurt Production: Easiest Cultured Dairy Product
Yoghurt is the perfect entry point for dairy processing – it’s simple, forgiving, and reliably successful even for complete beginners.
Simple yoghurt process:
Heat milk to 82°C to denature proteins (this creates thicker yoghurt). Cool to 43-46°C, add yoghurt culture (commercial starter or 2 tablespoons of plain yoghurt per litre), maintain at 43-46°C for 4-8 hours (longer incubation creates tangier yoghurt), then refrigerate to stop the culturing process. Strain through cheesecloth for Greek-style thickness if desired.
Australian climate advantages:
Hot summers make incubation easy with something like an insulated cooler box with hot water bottles maintaining the temperature perfectly. Winter may require an electric yoghurt maker ($30-$80) or an oven with just the light on.
Storage: Fresh yoghurt lasts 2-3 weeks refrigerated. Excess can be strained to Greek yoghurt (lasts 1 week longer) or frozen (texture changes but it’s fine for smoothies).
Pasteurisation Basics and Safety
If you’re processing milk for sharing or extended storage, pasteurisation is essential. This isn’t optional and it’s the difference between safe dairy products and potential serious illness.
Home pasteurisation methods:
Low Temperature Long Time (LTLT):
- Heat milk to 63°C
- Hold at 63°C for 30 minutes (use a double boiler to prevent scorching)
- Cool rapidly in an ice bath to below 4°C
- Most reliable method for small batches
High Temperature Short Time (HTST):
- Heat milk to 72°C
- Hold for 15 seconds
- Cool rapidly
- Requires precise temperature control and rapid heating equipment
Equipment needed:
- Accurate thermometer (digital instant-read is ideal)
- Heavy-bottomed pot or double boiler
- Stirring implement
- Ice bath for rapid cooling
- Clean, sterilised storage containers
Safety critical points:
You must maintain exact temperature for the full time period with NO shortcuts. Rapid cooling prevents bacterial growth during the cooling phase. Use pasteurised milk within 7-10 days, and never pasteurise milk more than once.
Legal Limits on Sharing or Selling Milk Products
What’s legally allowed for processed dairy products:
Butter:
- Legal to make for your own consumption from your own animals
- Cannot sell without proper dairy processing licence
- Informal sharing with friends/family exists in a legal grey area but is generally tolerated
Cheese:
- Legal to make for your own consumption including raw milk cheese
- Commercial sale of raw milk cheese (specifically hard to very hard cooked curd cheeses) has been legal in Australia since 2015, but requires special approval, extensive pathogen testing, specific aging requirements (minimum 90 days), and compliance with strict food safety standards set by state food authorities
- Commercial pasteurised cheese sales require dairy processing licence
- Most small-scale producers find the regulatory requirements for commercial raw milk cheese prohibitively complex and expensive
Yoghurt:
- Legal to make for your own consumption
- Cannot sell without dairy processing licence and commercial kitchen
- Must use pasteurised milk for any commercial production
Practical reality for home producers:
Focus on processing surplus into products for your household consumption. Informal gifting to close friends and family generally occurs without regulatory attention. However, moving into any regular, commercial-style distribution requires proper licensing. Penalties for unlicensed dairy processing can be substantial – fines range from $10,000 to $50,000+ – so do not make that mistake.
Reducing Future Surplus
Production Planning Tips
The best way to manage surplus is preventing overwhelming gluts in the first place through strategic planning and staged production.
Staggered planting strategies:
Rather than sowing entire packets of seeds at once, plant salad greens, beans, and fast-maturing vegetables every 2-3 weeks. Plant tomatoes over a 4-6 week window for extended harvest season. For zucchini and cucumbers, plant 2-3 plants every month through the growing season rather than 10 plants simultaneously creating a tidal wave of produce in January.
Succession planting example:
- Week 1: 6 lettuce seedlings + 20 bean seeds
- Week 3: 6 more lettuce + 20 more beans
- Week 5: Repeat
This provides continuous small harvests instead of overwhelming gluts that stress your kitchen, your preservation capacity, and your relationships with neighbours who are also drowning in zucchini.
Variety selection matters:
Choose determinate tomatoes (which set fruit simultaneously) for planned preservation sessions when you’ve blocked out time for canning. Select indeterminate varieties (continuous production) for fresh eating throughout summer. Mix early, mid, and late-season cultivars for extended harvests, and always research days-to-maturity so you can plan accordingly.
Animal Management for Consistent Production
Managing laying flock numbers:
Calculate eggs needed weekly (family consumption + regular commitments), then plan flock size to meet needs during low production periods (winter), not peak seasons. Expect surplus during spring/summer peaks, and cull older hens (over 3 years) as production drops to maintain consistent flock productivity.
Staggered pullet introduction:
Rather than replacing your entire flock simultaneously every 2-3 years, introduce 4-6 pullets annually. This creates a mixed-age flock with more consistent year-round production – some hens are laying whilst others are moulting, smoothing out seasonal production peaks and troughs.
Dairy animal management:
Understand your family’s realistic milk consumption first; most households use just 2-4 litres weekly. A house cow producing 15+ litres daily creates unavoidable surplus that requires processing infrastructure, time, and reliable outlets. Consider share-milking arrangements with neighbours or friends, or explore whether dairy goats (producing 2-4 litres daily each) might better match your household scale. Plan kidding/calving timing around your availability and processing capacity.
Linking Production to Demand Cycles
Build systems before scaling up:
Establish preservation infrastructure (freezer space, canning equipment, dehydrator) before increasing production. Develop reliable sales outlets or exchange networks whilst you’re still small-scale. Test processing methods at small scale before investing heavily in equipment or livestock. Create storage capacity appropriate to your actual production goals, not optimistic fantasies.
Match production to actual consumption patterns:
Track household eating patterns for 3 months before expanding gardens significantly. Calculate realistic preservation capacity – consider hours available, equipment limits, and storage space constraints. Account for seasonal work demands because harvest period might coincide with peak work commitments or family holidays. Plan buffer capacity for unexpected surpluses, but don’t overcommit based on theoretical possibilities.
Customer-driven production (if selling):
Establish regular customers before planting specifically for them. Grow to known orders rather than hoping to find buyers post-harvest. Accept that not all crops will sell at peak quality, so plan for your own use of unsold produce. Build incrementally based on proven demand, not optimistic projections about farmers market popularity or neighbour enthusiasm.
Turning Surplus into Opportunity
Managing abundance successfully transforms potential waste into valuable resources, whether that’s feeding your family through winter from preserved harvests, building community connections through sharing and swapping, or generating modest income from surplus sales.
The key is realistic assessment of your time, infrastructure, and genuine demand rather than optimistic assumptions that “someone will buy it” or “we’ll find a use for it somehow.” These assumptions lead to burnout, waste, and disillusionment with self-sufficient living.
Start with prevention through planning: Staged planting, appropriate production scales, and realistic consumption estimates prevent overwhelming gluts that lead to waste and burnout.
Build infrastructure progressively: Invest in preservation equipment and storage as your production increases, not after you’re already drowning in produce with nowhere to put it.
Understand regulations: Following basic food safety practices and knowing what requires licensing prevents legal problems whilst allowing legitimate sharing and sales within appropriate frameworks.
Focus on quality relationships: Whether you’re swapping with neighbours, selling at markets, or supplying regular customers, consistent quality and reliability matter far more than volume or variety.
The goal isn’t eliminating all surplus; small buffers handle unexpected situations and seasonal variations beautifully. Rather, it’s managing production at sustainable levels that match your household capacity, preservation infrastructure, and available time. Abundance should feel like opportunity and security, not an overwhelming burden that makes you dread January harvests.
Disclaimer: This article provides general information about managing surplus produce in Australia. Food safety regulations vary by state and are subject to change. Always verify current requirements with your state food authority before selling or distributing food products. The state government websites listed in this article provide the most up-to-date regulatory information. Consult with your local council regarding planning regulations for farm gate sales and signage. This information does not constitute legal, financial, or food safety advice. The author and Grainshed.com.au accept no liability for actions taken based on this information. Information current as of November 2025.